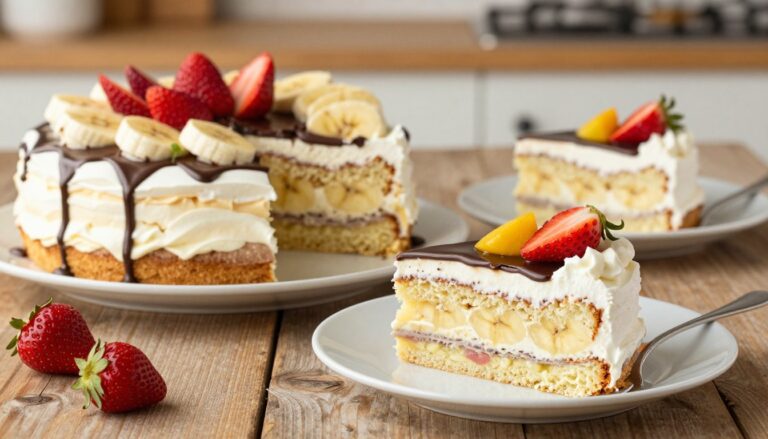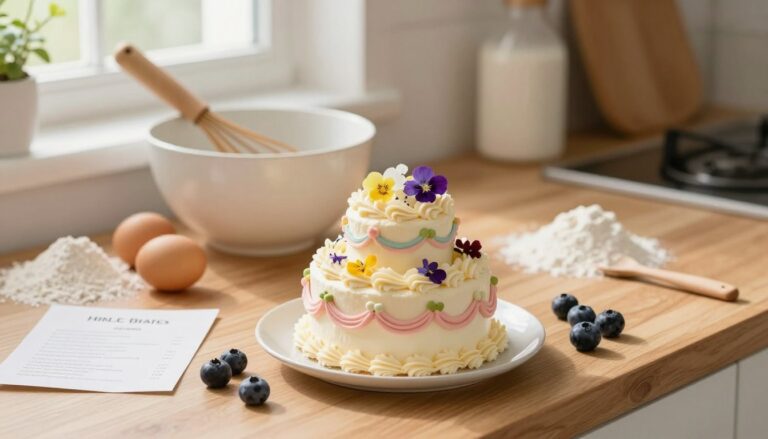
Strawberry Crunch Cake Recipe
I love a dessert that tastes nostalgic but comes together fast. This take turns that ice cream truck memory into a sliceable, party-ready treat: fluffy cake, creamy frosting, and a strawberry-vanilla crunch topping all in one.
This is an easy, semi-homemade option I test when I want wow without fuss. I’ll show you ways to make a layered version or a simple 9×13, so you can pick what fits your schedule and skill level.
I write for home bakers who want impressive-looking results without pastry-school tricks. You’ll get flavor boosters, frosting choices, two topping methods, and tips for summer fruit timing. Pin it now and save for later—this is one dessert you’ll want to make when berries are at their peak.
For a close inspiration and method notes, see Strawberry Crunch Cake Recipe.
What Makes Strawberry Crunch Cake So Irresistible
What makes this treat a showstopper is how it balances soft, creamy, and crunchy textures. I engineered the bite so every forkful hits nostalgia and delight.
This version is basically a strawberry shortcake bar in cake form—strawberry plus vanilla and crunchy crumbs that trigger those childhood memories. The goal is clear: soft, moist base; silky frosting; and a crisp top that stays snappy.
I think of the profile like a tiny ice cream party in every slice: the strawberry and vanilla pairing reads like classic ice cream flavors, even though you’re eating a frosted layer dessert.
- Target bite: tender crumb, creamy frosting, crunchy topping.
- Crunch tip: make the topping separately and press it on last to keep it crisp.
- Boost strawberry flavor: add a little gelatin or fold in freeze-dried strawberry powder for bright, real fruit notes.
If you love that strawberry-vanilla combo, this one’s going to disappear fast. It’s not just about looks—the crunch is the texture hero, not mere decoration.
Time, Servings, and Prep Plan for Busy Bakers
Let’s map out a realistic timeline so your dessert day feels calm, not rushed. Below I give a clear minute-by-minute breakdown for a cake-mix approach, explain why a brief chill matters, and show how to split work across days.
Typical prep and bake timeline
Prep about 20 minutes, bake 30–40 minutes depending on pan size, then set aside 20 minutes for decorating. Plan roughly 1 hour 15 minutes total active time. After frosting, chill 20–30 minutes to firm layers so slices stay tidy.
Decorating and chilling to keep layers steady
A quick 20–30 minute chill is not optional for layered cakes—cold frosting grips layers and prevents sliding. If you’re doing a 9×13 sheet, decorating time drops a bit; multi-tier rounds need more patience and chill time.
Make-ahead timeline and storage
- Bake one day, wrap and refrigerate.
- Frost the next day; add the crunch just before serving.
- Store leftovers in an airtight container in the fridge for up to 5 days.
| Format | Approx. total minutes | Servings |
|---|---|---|
| 9×13 sheet | 75–90 minutes | 12–16 servings |
| Two 8″ rounds | 90–110 minutes | 10–12 servings |
If you want to make strawberry flavor stand out, plan those add-ins while you bake so you don’t waste time. Having the right pan and a sturdy container ready will keep the process smooth and the topping crisp.
Ingredients You’ll Need for Strawberry, Vanilla, and Crunch
Start with simple, familiar ingredients and you’ll get bakery-style results at home.
I divide the shopping list into four building blocks so you can grab everything in one trip: cake base, strawberry booster, frosting, and the crunchy topper.
Cake base options
Choose a white, yellow, or strawberry cake mix depending on color and flavor. White keeps the vanilla note bright. Yellow adds a buttery depth. A strawberry mix boosts pink color and fruit flavor.
Strawberry boosters
For bold, classic flavor use 2 packets of strawberry gelatin—one in the batter and one in the topping. For real-fruit punch, fold in freeze-dried strawberries to the crunch mixture.
Frosting and crunch staples
American buttercream (about 5 cups) gives rich, bakery-style frosting. For a lighter finish, whip 2 cups heavy cream with 1/2 cup powdered sugar and 1 tsp vanilla extract.
Crunch: use about 2.5 cups crushed Nilla wafers or 22 Golden Oreos plus 1/4 cup melted butter (or use Oreos for extra chocolate notes). Pat sliced strawberries dry before adding between layers to avoid watery layers.
| Item | Why use it | Amount |
|---|---|---|
| White mix | Neutral vanilla base | 1 box |
| Yellow mix | Buttery flavor, richer color | 1 box |
| Strawberry mix | Extra pink color and fruit note | 1 box |
| Strawberry gelatin | Boosts classic strawberry flavor | 2 packets |
| Golden Oreos / Nilla | Texture + sweet crunch | 2–2.5 cups (crushed) |
Tools and Pans That Make This Recipe Easier
A few simple pans and a tidy workspace turn this into an easy showstopper. Choose based on the crowd: easy slices or dramatic layers.
Best pan sizes for your occasion
For potlucks and quick slicing, a 9×13 pan is your friend. It bakes evenly and is low-stress to slice.
Want a layered look? Two 8-inch rounds (or two 9-inch rounds) work great—use 8×2-inch pans for taller layers. Deeper pans will lengthen oven time, so check often.
Food processor tips and a no-processor workaround
A food processor makes fine, even crumbs fast and keeps the crunch light. Pulse in short bursts so you don’t overwork cookies.
No processor? Put cookies in a zip bag and crush with a rolling pin. Use a large bowl to mix crumbs and butter so nothing flies everywhere.
- Pick the pan by service style: sheet for ease, rounds for show.
- Line pans and prep your workspace before baking to speed assembly.
- Keep some crumbs back to press onto the top right before serving.
| Format | Pan size | Why choose it |
|---|---|---|
| Sheet | 9×13 pan | Easy slicing, feeds a crowd |
| Layer | 8-inch rounds | Classic stacked look |
| Deeper | 8×2-inch pans | Taller layers; longer bake time |
How to Bake the Cake Layers or Sheet Cake at 350°F
A reliable 350°F bake is the backbone of this dessert—get it right and you’ll have soft, moist layers every time. Preheat the oven and prep pans so you’re ready when the batter is mixed.
Mixing in a small strawberry boost
Whisk one packet of strawberry gelatin into the dry mix before adding wet ingredients. This little upgrade lifts fruit flavor without changing bake time or texture.
Doneness cues so you don’t overbake
Bake a 9×13 at 350°F for about 30–35 minutes. Layers in shallower pans may finish a few minutes sooner. Use a toothpick in the center—if it comes out with a few moist crumbs, stop the oven.
Cooling and leveling before you frost
Cool cakes completely on a rack; warm layers will melt frosting and ruin the top cake finish. If a dome forms, level with a serrated knife so stacked cakes sit flat and stable.
| Format | Bake time (minutes) | Doneness cues |
|---|---|---|
| 9×13 sheet | 30–35 | Toothpick clean with few crumbs; springy top |
| 8-inch rounds (shallow) | 25–30 | Light golden edges; toothpick with moist crumbs |
| 8×2-inch deep pans | 30–35 | Edges pulling from pan; gentle spring back |
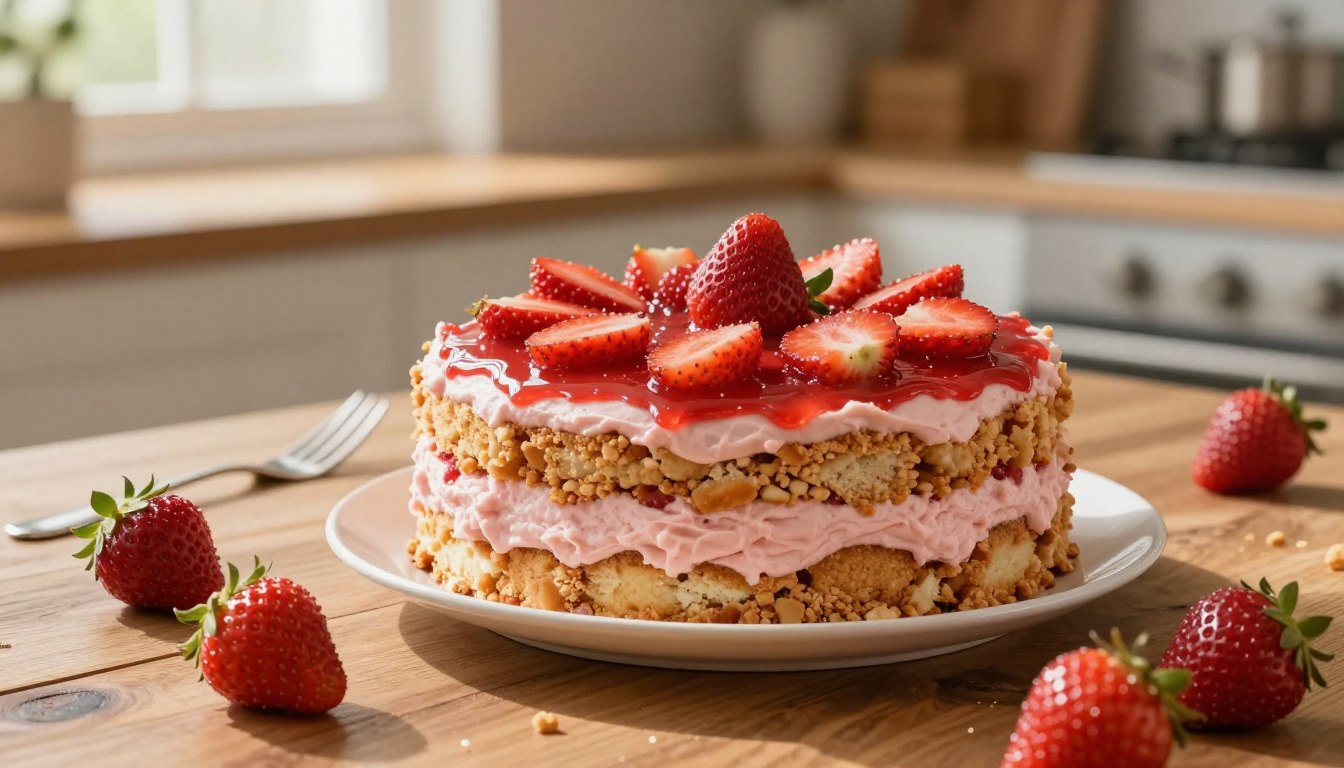
Strawberry Crunch Topping That Stays Crisp

A good topping should snap, not slump — and it’s easier than you think to get there. Below I share two reliable methods and a quick rescue plan so your topping stays crisp on the cake.
Freeze-dried fruit + vanilla cookies method
Pulse freeze-dried strawberries with vanilla cookies in a food processor until coarse crumbs form. Stir the dry mixture in a bowl, then drizzle melted butter a little at a time until the crumbs hold when pressed.
Keep this topping separate until the last minute. It stays light and crunchy without extra baking.
Golden Oreos + strawberry Jello “wet sand” method
Process Golden Oreos (or regular oreos if that’s what you have) into crumbs. Split the crumbs and mix strawberry gelatin into half for pink pockets of flavor.
Drizzle melted butter into the crumbs to make a “wet sand” mixture. Bake the vanilla portion 5 minutes at oven 350; bake the strawberry portion 8 minutes. Cool completely, then combine for a crunchy, colorful top.
How to fix soggy topping
- Spread the soggy mixture on a lined tray.
- Dry in the oven at oven 350 for 4–8 minutes, watching closely.
- Cool fully before using; add extra cookies if it still seems soft.
| Method | Bake/finish | Texture note |
|---|---|---|
| Freeze-dried + vanilla | No bake; press with melted butter | Bright, crisp, airy |
| Golden Oreos wet sand | Vanilla 5 min / Strawberry 8 min at oven 350 | Dense, colorful, clinging |
| Rescue plan | Oven dry 4–8 min | Restores crisp, removes moisture |
Frosting and Filling Options for a Creamy Finish
Pick the frosting that fits your schedule and your sweet tooth — it changes how the whole dessert behaves.
I use American buttercream when I want a sturdy, bakery-style finish. It handles layers, holds piped edges, and stands up in the fridge. It’s sweet and rich (think butter and powdered sugar), so pair it with thin fruit layers to avoid an overly sugary bite.
Whipped cream frosting: light and fresh
For warm-weather or an ice-cream vibe, whipped cream is the go-to. Chill a bowl and cup, pour 2 cups cold heavy cream, add 1/2 cup powdered sugar and 1 tsp vanilla extract.
Whip to stiff peaks — stop when the cream holds shape but is still glossy. Work quickly and keep the finished frosting cold so it stays stable.
Layer add-ins and flavor boosters
- Use thin swirls of jam or pie filling to anchor fruit without sogginess.
- Pat sliced strawberries dry before layering to prevent weeping.
- Fold in a little freeze-dried strawberry powder to intensify fruit flavor without extra moisture.
| Frosting | Stability | Sweetness | Best for |
|---|---|---|---|
| American buttercream | Very stable | High (butter + powdered sugar) | Layered, piped decoration, make ahead |
| Whipped cream | Moderate (keeps best chilled) | Light to moderate | Spring/summer, ice-cream-style assembly |
| Thin jam or pie filling | Depends (use sparingly) | Fruit-forward | Flavor pockets between layers |
Want layered inspiration? Try a buttercream base with thin fruit filling, or go full ice-cream feel with whipped cream and jam. For more method ideas and a tested approach, see a close guide at strawberry crunch method.
Strawberry Crunch Cake Recipe Assembly and Decorating
Assembly is where the layers come together and the real magic happens. A calm plan prevents sliding, soggy layers, and last-minute panic. Follow short steps and chill between moves to keep everything tidy.
Layering and chilling for clean slices and stable tiers
Place a layer on your turntable or board and spread an even layer of frosting or jam. Add sliced strawberries sparingly so the layers don’t weep.
Chill 20–30 minutes after stacking (this firms the filling and helps the next coat glide on). If you need extra stability, pop the whole stack in the freezer for 10 minutes before crumb coating.
Crumb-coating with frosting, then pressing on the crunch
Apply a thin crumb coat — think of it as glue that traps crumbs. Use an offset spatula to smooth a light layer, then chill 15–20 minutes until set.
For the final coat, frost evenly and press the crunch mixture onto the sides and top with gentle, small handfuls. Rotate the cake as you press so you don’t smash the cream.
Simple decorating ideas: piped swirls, fresh strawberries, extra crunch on top
Use a star tip for quick piped swirls around the top edge. Nest a few hulled strawberries in the center for color and a classic finish.
Finish with a scatter of extra crunch on the top rim for drama. Let the assembled cake rest chilled for 20 minutes before slicing so the layers hold and slices come out clean.
| Step | Why it matters | Approx minutes |
|---|---|---|
| Layer & fill | Even layers prevent sliding and leaking | 5–10 minutes |
| Chill between steps | Firms filling and frosting for clean edges | 20–30 minutes |
| Crumb coat | Traps crumbs for a smooth final finish | 10–15 minutes (+ chill) |
| Press topping & decorate | Protects frosting and adds texture | 10 minutes |
Serving, Storage, and Leftover Tips for Best Texture

A little forethought at the end of baking day keeps the top crisp and the filling stable. The big rule: add the crunchy topping just before serving if you want that snap, especially when you make the dessert a day ahead.
When to add the crunch if making ahead
If you bake and frost the day before, cover the frosted layers and chill. Add the crunchy top right before guests arrive so it stays crisp.
How long it keeps in the fridge and the best container to use
Store leftovers in an airtight container in the fridge. Depending on fillings and frosting, the cake keeps well for 3–5 days; use your judgement based on smell and appearance.
- Container: airtight is best to prevent staling and odor transfer.
- Time: most versions last 3 days; sturdier frostings extend freshness to 5 days.
- If you want cleaner slices, chill or freeze briefly before cutting.
Serving suggestions and a quick nutrition note
Serve slices with extra whipped cream, fresh strawberries, or a scoop of ice cream for an indulgent finish. For an ice-cream-style moment, freeze the whole cake briefly — slicing is neater and the combo is irresistible.
| Option | Storage | Best for |
|---|---|---|
| Room chill | Short term in container | Same-day service |
| Fridge airtight | 3–5 days | Make-ahead party |
| Freezer | Up to 2 weeks | Ice cream-style slices; firm cutting |
Note: calories and fat vary widely between buttercream and whipped cream. Keep portions sensible and enjoy—if the crunch softens, it still tastes delicious; texture just changes.
Bring on the Crunch and Make This Spring Dessert a Tradition
Make this as a go-to for warm-weather gatherings—the payoff is huge and the fuss is small. This recipe gives you a reliable formula: tender cake, creamy frosting, and a crunchy strawberry-vanilla topper you can press on at the last minute.
Use a box mix for speed or bake from scratch for extra depth. Choose a sheet pan for easy slicing or rounds for a dramatic layered finish. Swap buttercream for whipped cream when you want a lighter, ice cream–style vibe.
Have fun crushing cookies in a bag, sprinkling crumbs like confetti, and watching folks return for one more sliver. One final tip: keep the topping dry and add it right before serving to keep that signature snap.
Pin this dessert, save the recipe, and make it at your next get-together—this is one you’ll bake again and again.