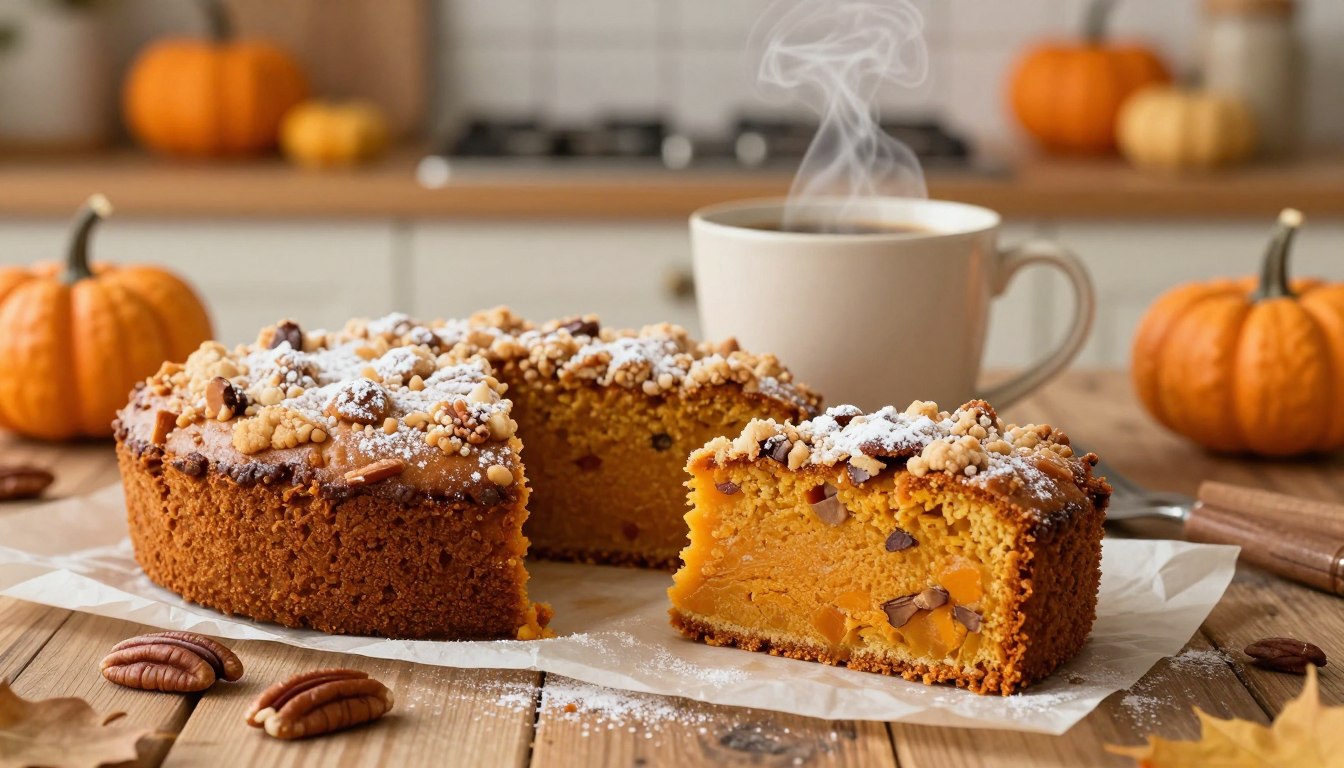
Pumpkin Coffee Cake Recipe
I’m about to help you bake a cozy, super-moist pumpkin coffee cake with a buttery streusel and a sweet maple drizzle—aka the kind of fall project that makes your kitchen smell like a candle (but better).
This bake delivers a tender crumb, warm spice, crunchy topping, and a glaze that looks fancy even if you’re still in your pajamas. It comes together in about an hour and keeps well at room temperature for days.
This is for home bakers who want bakery-style results without a million steps. The trick? Pumpkin puree plus oil and a bit of dairy make a plush loaf, while a brown sugar streusel adds that craveable contrast.
You’ll learn smart swaps, pan options, layering methods (yes, double-streusel is a thing), glaze choices, and how to store or freeze your loaf. I’ll even show a quick pumpkin spice latte–inspired twist with espresso vibes for extra fall energy.
Why this pumpkin coffee cake belongs on your fall breakfast table
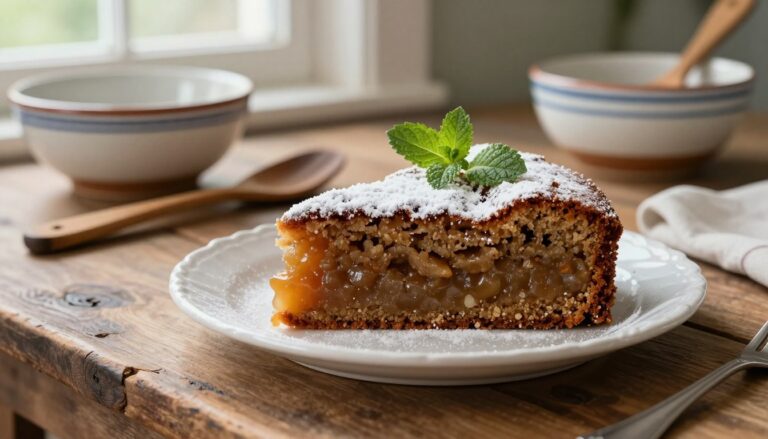
This loaf earns a permanent spot on your fall table: tender, warmly spiced, and crowned with a buttery streusel that snaps with every bite.
Think soft, moist crumb beneath a thick, crisp top—plush and crunchy in the same forkful. The streusel adds a brown-sugar crunch and buttery flavor that makes each bite feel bakery-level without fuss.
Taste and texture
The crumb stays fluffy thanks to oil and pumpkin puree, while the streusel bakes into clumps that contrast perfectly with the tender interior.
Quick timeline
Plan about 60 minutes from start to finish: mix, layer, bake, cool briefly, then drizzle. Depending on your pan, you’ll be slicing in roughly an hour—about the time it takes to brew a mug of coffee.
What “coffee cake” really means
It’s meant to be eaten with coffee, not made with it. So if your morning drink is a pumpkin coffee or a spiced latte, you’re already set.
- Bakery feel: warm spices + brown sugar = big autumn flavor.
- Crowd-pleasing: moderate sweetness concentrated in the streusel and glaze.
- Customizable: tweak spice level or add nuts for crunch.
| Feature | Why it matters | Fast check |
|---|---|---|
| Texture | Soft crumb + crisp streusel = contrast in every bite | Plush + crunchy |
| Time | Simple steps keep the bake under an hour | ~60 minutes |
| Pairing | Pairs perfectly with coffee or a pumpkin spice drink | Mug on the side |
Pumpkin Coffee Cake Recipe: ingredients you’ll need
Before you preheat the oven, let’s walk the grocery list like we’re shopping together. I’ll point out the must-haves, the flexible swaps, and the one thing you must not buy for this bake.
Puree vs. pie filling (what to buy)
Use canned pumpkin puree labeled only “pumpkin.” Do not use pumpkin pie filling — it’s sweetened and spiced and will ruin the cake batter balance.
Dry base to whisk together
- All-purpose flour and a pinch of salt for structure.
- Baking powder and baking soda for lift.
- Whisk together these dry ingredients in a bowl before folding into wet ingredients.
Warm spice blend
Use pumpkin pie spice or mix cinnamon, ginger, nutmeg, and a touch of allspice to taste. This is the cozy backbone of flavor.
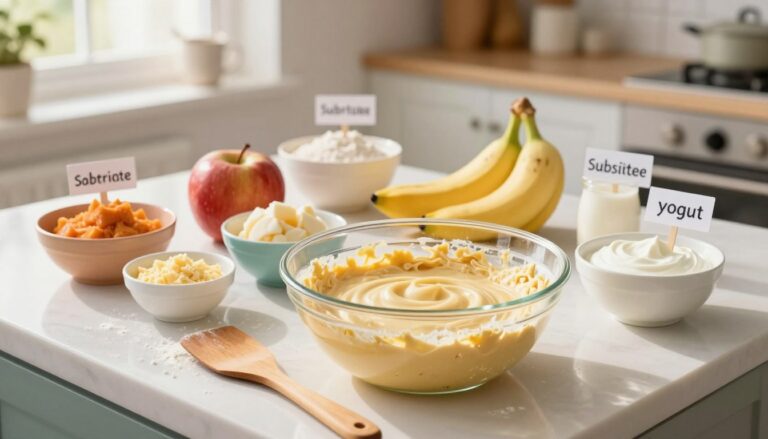
Moisture makers & sweeteners
Oil keeps the crumb soft. Add sour cream or whole milk (full-fat yogurt or buttermilk work as substitutes). Eggs and vanilla extract give structure and aroma.
For sweeteners, I use brown sugar for caramel depth and granulated sugar for clean sweetness—both help the streusel and glaze shine.
| Item | Why it matters | Swap |
|---|---|---|
| Pumpkin puree | Moisture and flavor (unsweetened) | None — don’t use pie filling |
| Oil + dairy | Tender crumb and richness | Yogurt or buttermilk |
| Flour + leaveners | Structure and lift | Measure carefully |
Streusel topping that bakes up thick, buttery, and crisp
Think of streusel as the crunchy hat your loaf deserves—golden, clumpy, and slightly crackly. A proper streusel blends flour, brown sugar, and butter with warm spice so each bite snaps against the soft interior.
Brown sugar streusel basics: flour + butter + pumpkin pie spice
In a bowl, mix flour and brown sugar with pumpkin pie spice and a touch of cinnamon. Cut cold butter into the dry mixture until you see sandy bits and pea-sized clumps. That texture is the goal: some crumbs, some chunks.
Optional crunch: pecans or walnuts
Add chopped pecans or walnuts for toasty nuts and a pleasant snap on the top. Fold them in last so they stay distinct in the final mixture.
Chill the streusel so it holds clumps in the oven
A quick trip to the fridge firms the butter. Cold clumps bake into layered rubble instead of melting flat. Use a fork, pastry cutter, or your fingers—whatever fits your mood and tools.
| Component | Purpose | Pro tip |
|---|---|---|
| Flour | Structure for crumbs | Measure, then fluff |
| Butter | Richness and clumps | Cold and cut-in for best texture |
| Brown sugar | Caramel depth | Pack lightly into the bowl |
Maple glaze options for the perfect finishing drizzle
A sweet glaze is the last step that makes slices look and taste like they came from a bakery. I like two simple paths: real maple syrup for gentle, natural sweetness, or maple extract for bold maple flavor with less liquid to thin the batter.
Start with powdered sugar and add maple syrup or a few drops of maple extract. Whisk to a smooth mixture. If it’s too thick, loosen with milk a few drops at a time (oat or almond milk work great). If it’s thin, add more powdered sugar to tighten the drizzle.
Want a vanilla twist? Stir a splash of vanilla extract into the powder and milk blend for a classic bakery finish. Drizzle warm for a soft, melty look, or wait until the loaf cools for crisp, defined lines.
| Glaze base | Liquid | Result | Best use |
|---|---|---|---|
| Powdered sugar + maple syrup | Maple syrup + milk to thin | Natural maple sweetness, glossy | Classic fall finish |
| Powdered sugar + maple extract | Milk only (less liquid) | Bright, bold maple flavor | Strong maple punch without sogginess |
| Powdered sugar + vanilla | Milk or non-dairy milk | Warm, familiar bakery flavor | When maple isn’t preferred |
Pan sizes, bake times, and the best baking setup
Choosing the right pan and setup makes the difference between a perfect loaf and a soggy center. I’ll walk you through tested options and a simple preheat checklist so you get steady results every time.
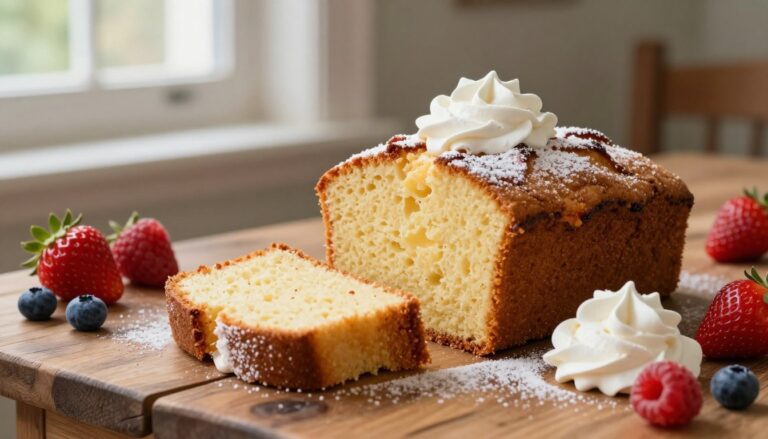
Small-batch loaf: 8×4-inch
Use an 8×4-inch loaf for bars or squares. This pan gives a taller loaf and is great when you want fewer slices. Baking time is usually shorter, so start checking a few minutes early.
Classic option: 8-inch square metal pan
An 8-inch square metal pan is the classic coffee cake look. Metal conducts heat well, so the cake rises evenly and you avoid a dense center. If you want that bakery-style top, this is the way to go.
Glass or ceramic pans
Glass and ceramic heat slower. Expect to add 5–15 extra minutes depending on thickness. Use a toothpick test for doneness rather than only the clock.
Oven temp checkpoint & setup
- Preheat oven to 350°F and use an oven thermometer—some ovens run hot or cool.
- Place the pan on the center rack and avoid opening the door for the first 25 minutes.
- Scale note: if you change pan size, watch the time and test with a toothpick; one cup more batter can add minutes.
| Pan type | Result | Time note |
|---|---|---|
| 8×4 loaf | Taller loaf, small batch | Check a few minutes early |
| 8-inch square metal | Even rise, bakery look | Standard at 350°F |
| Glass / ceramic | Gentle browning, slower bake | +5–15 minutes; test for doneness |
Step-by-step: how to make pumpkin coffee cake from scratch

Grab a bowl and your whisk—this short guide moves you from prep to glaze with clear cues. I keep each step small so you can follow along without scrambling.
Prep the pan for easy lifting
Line your pan with a parchment “hammock” that overhangs two sides. This makes lifting the loaf out clean and stress-free after baking.
Mix the streusel until clumpy
In a small bowl, combine flour, brown sugar, chopped nuts (optional), and cold butter. Use a fork or pastry cutter and stop when you see crumbly clumps—this is the streusel that bakes into crunchy pockets.
Whisk the wet ingredients
In a larger bowl, whisk together pumpkin, oil, eggs, vanilla extract, and milk until cohesive. This creates a smooth cake batter with even spice distribution.
Fold dry ingredients gently
Sift or whisk dry ingredients then fold them into the wet mix. Stop as soon as no flour streaks remain. Overmixing tightens the crumb—so be gentle.
Layer and bake
Spoon half the batter into the pan, add a layer of streusel, then the rest of the batter and a final streusel top. Bake at 350°F until a toothpick comes out clean or with moist crumbs, about 45–55 minutes depending on pan size.
Cool and glaze
Cool briefly in the pan, then lift to a rack with the parchment. Glaze warm for a drippy finish or wait until room temp for neat lines.
| Step | Visual cue | Why it matters |
|---|---|---|
| Parchment hammock | Paper overhangs sides | Easy removal, no scraping |
| Streusel | Pea-sized clumps | Crisp, buttery top |
| Folding dry | No flour streaks | Tender crumb, not dense |
Pumpkin spice latte-inspired twist with an espresso brown sugar layer
I like to add a PSL-style surprise: an espresso brown sugar layer that gives the loaf a warm, spiced lift and a faint roast note. It tastes like a cozy café moment folded into home baking.
Espresso powder filling: brown sugar, spices, and a pinch of salt
In a small bowl mix brown sugar with instant espresso powder, pumpkin spice, and a pinch of salt. Stir until the mixture feels even and slightly damp—easy to sprinkle, not clumpy.
How to keep clean, even layers while assembling
Spoon a little more than half the batter into the pan, then scatter the espresso brown sugar across the surface. Dollop the remaining batter in spoonfuls above the filling so it doesn’t sink and swirl.
Gently spread the top batter with the back of a spoon. If you want picture-perfect slices, weigh the bottom and top batter so each layer is even before baking.
| Component | Purpose | Pro tip |
|---|---|---|
| brown sugar + espresso | Deepen roast and spice | Mix in a bowl and sprinkle evenly |
| pinch of salt | Brighten the sweetness | Add a small pinch; it lifts flavor |
| weighing batter | Even layers | Use kitchen scale for clean slices |
Expert baking tips for a super moist, fluffy coffee cake
Nail a few pro habits and your loaf will stay tender, tall, and evenly baked every time. These small changes focus on measuring, temperature, and gentle technique so your baking becomes more reliable.
Weigh ingredients for consistent results
I’m team kitchen scale. Measuring in grams removes guesswork—especially with flour—and cuts cleanup because you can weigh straight into one bowl. That makes many recipes repeatable from batch to batch.
Bring dairy and eggs to room temperature
Pull milk and eggs about an hour before you start. Room ingredients help the cake batter emulsify smoothly. The batter will look silky instead of curdled, and rise more evenly in the oven.
Avoid overmixing and read doneness beyond a toothpick
Stop mixing when the last streak of flour disappears. Overmixing develops gluten and turns tender crumb into chewy bread vibes. For doneness, look for a set top, slightly pulled edges, and no wobble in the center.
| Tip | Why it helps | Quick fix |
|---|---|---|
| Weigh in grams | Precise amounts, consistent texture | Measure flour in one bowl; fewer dishes |
| Room-temp ingredients | Smoother batter, better rise | Pull dairy and eggs 1 hour prior |
| Gentle mixing | Prevents tough crumb | Fold until no flour streaks |
| Oven check | True temp matters | Use an oven thermometer to verify |
Make-ahead, storage, and freezing (so it stays tender for days)

Make-ahead magic: this loaf keeps its texture and flavor when stored the right way. I always recommend enjoying one warm slice the day it’s baked, but thoughtful storage extends the joy.
Counter storage in an airtight container
Store the loaf covered in an airtight container at room temperature. It’s best the same day, but it stays moist and tasty for 3–4 days.
Fun bonus: the spice notes deepen overnight, so tomorrow’s slice can taste cozier than the first one.
Freezing individual slices
Wrap each slice tightly in plastic wrap. Put wrapped slices into a freezer bag or airtight box to prevent freezer burn.
Thaw at room temperature for best texture. If you want it warm in a few minutes, microwave a slice for 15–20 seconds or pop it in a 300°F oven for a few minutes.
Freezing the whole loaf
Freeze the whole loaf unglazed in an airtight container. Defrost fully at room temp before you drizzle the glaze.
Avoid the fridge unless your kitchen is very warm; refrigeration dries the crumb faster than room temp storage.
| Storage method | Best use | Thaw / tip |
|---|---|---|
| Room-temp airtight | Same-day eating; up to 3–4 days | No thaw; slice as needed |
| Frozen slices | Single-serve keeps for months | Defrost at room temp; warm 15–20 seconds |
| Whole loaf frozen | Good for make-ahead hosting | Thaw fully, then glaze for best finish |
Serving ideas and easy variations to match your pantry
A warm slice and a steaming mug make any morning feel intentional and cozy. Serve the loaf right from the oven with a cup of strong coffee, a mellow pumpkin coffee, or a full pumpkin spice latte for the ultimate fall pairing.
Short on ingredients? No sweat. Swap plain full‑fat yogurt for sour cream, use buttermilk in place of milk, and pick light or dark brown sugar based on what you have. These swaps keep texture and flavor intact with minimal fuss.
- Add-ins: stir in chocolate chips for dessert vibes or chopped nuts for crunch. Both play nicely with a maple or vanilla glaze.
- Spice control: boost cinnamon for a louder spice note, or scale back if you prefer something subtler.
- Flavor tweaks: a splash more vanilla or a slightly thicker glaze gives a bakery-case look without extra effort.
| Swap | Why | Effect on bake |
|---|---|---|
| Yogurt for sour cream | Same richness, fewer ingredients | No major time change |
| Buttermilk for milk | Brightens tang and tenderizes | May brown slightly faster |
| Chocolate or nuts | Add dessert note or crunch | Can lengthen bake a few minutes; test doneness |
Small changes nudge bake time and texture, so trust visual cues and the toothpick test more than the clock. Enjoy it warm for breakfast, or slice and pack for a portable, cozy treat.
Now it’s your turn to bake a cozy fall cake you’ll want all season
Let’s wrap this up with the short checklist that makes a great fall loaf every time. Use pumpkin puree (not pumpkin pie filling), chill the streusel so it bakes into clumps, and preheat the oven to 350°F—an oven thermometer helps with accuracy.
Don’t overmix: fold until just combined. Bake until a toothpick comes out clean or with moist crumbs, not wet batter. Cool before glazing, or drizzle warm if you want a soft finish.
Try the classic version, double-streusel layers, or the espresso brown sugar twist. Save the cinnamon-crumb version, plan a weekend bake, and freeze a slice for future-you. You’ve got this—customize spice, swap dairy, add nuts or chocolate, and make it your signature fall bake.