Pecan Pie Dump Cake Recipe
I love a dessert that tastes fussy but is actually simple. This version gives you pecan pie vibes with zero crust stress, all baked in a single 9×13 pan at 350°F. It serves about 12 and needs only 20 minutes of hands-on time, then the oven does the rest for roughly an hour longer.
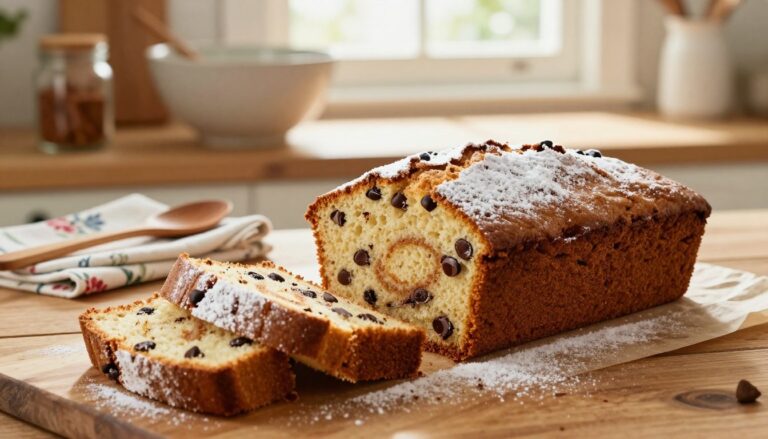
Expect a gooey, sticky bottom that echoes classic pecan pie, topped with a buttery cake layer that bakes to a golden crunch. You can spoon warm portions over ice cream or cut neat squares for a party platter.
This is for busy home bakers, potluck heroes, and anyone who dreads rolling a crust. I’ll walk you through quick layers and the small tricks that stop dry powdery spots and prevent a too-dark top. If you want step-by-step tips and the full method, check out my detailed guide here: the full walk-through.
Why This Pecan Pie Dump Cake Hits All the Right Notes
This version gives you all the warm, caramel-forward notes of a classic filling without the labor of rolling or chilling a crust. It’s the no-drama path to that beloved holiday taste, served in one pan and ready to wow a crowd.
The magic is the contrast: a sticky, gooey base that tastes like old-school pie sits under a buttery, crunchy cake topping. That middle goo pulls at spoons while the top browns and becomes crisp—two textures in every bite.
This dessert travels well for Friendsgiving, bake sales, and potlucks. It slices neatly after a rest, holds up on a platter, and keeps its flavors even after a drive across town.
The “dump” method is a feature, not a shortcut: layered ingredients bake into distinct pie and cake textures. If you’re not a baker, this is your crowd-pleasing cheat that’s forgiving and repeatable. Later, I’ll share tips on doneness, foil tenting, cooling for clean slices, and simple swaps so you can tailor the final flavors with confidence.
What a Dump Cake Is (and Why It Works for Pecan Pie)
Think of a dump cake as one-pan magic: layers go in, the oven does the blend, and you get two distinct textures from a single bake.
I define a dump cake in one breath: you layer the filling, sprinkle dry cake mix, add butter, and bake—no stand mixer and no fuss.
The layering trick that creates two textures
Don’t stir. That rule matters. Stirring turns everything into one uniform bake. Leaving layers intact gives you a gooey bottom and a golden top.
- The bottom sets like a custardy filling as it heats from the oven floor upward.
- The dry mix + butter browns into a crisp, buttery top.
- The pre-bake mixture may look odd — that chaotic layer is normal and expected.
| Layer | Behavior During Baking | Why It Matters |
|---|---|---|
| Filling | Thickens into a sticky base | Holds nuts and delivers custardy texture |
| Dry mix + butter | Browns and crisps | Creates the cake-like top |
| Final | Two textures in one | That contrast is the appeal of a pie dump cake |
Next up: ingredient balance—get the syrup, eggs, and butter right so the result is gooey, not greasy.
Ingredients You’ll Need for a Classic Pecan Pie Dump
A few smart ingredients turn simple layering into rich, homemade flavor. Below I list the essentials and explain what each does so you can shop with confidence.
The gooey base: eggs, corn syrup, brown sugar, vanilla, and cream
Use 4 large eggs to set the filling and give structure. Add about 3/4–1 cup of corn syrup to keep the center glossy and sticky.
Stir in 3/4 cup packed light brown sugar for caramel depth, 2 teaspoons vanilla for warmth, and 2 tablespoons heavy cream to soften the sweetness.
The crunchy stars: pecans in halves, chopped, or a mix
Go for 2–3 cups of pecans. Halves look classic on top, chopped nuts spread texture through the center, and a mix gives both show and crunch.
The easy topping: yellow cake mix
A 13.25-oz butter yellow cake mix (or any yellow cake mix) is the quickest route to a golden, bakery-style top. It browns beautifully with butter and needs no extra work.
Flavor boosters: pumpkin pie spice or cinnamon
Add 2 teaspoons pumpkin pie spice for holiday depth, or one teaspoon cinnamon for a simple warm note that complements the nuts.
Butter choices: salted vs. unsalted and when to add salt
- Butter: 1 cup melted. Salted is convenient; use unsalted and add 1/4 teaspoon salt if you prefer control.
- Corn syrup choice: dark for richer molasses flavor, light for a milder caramel note—either works.
- Buying guide: splurge on fresh pecans; the boxed yellow cake mix is fine to keep this quick and reliable.
| Ingredient | Amount | Why it matters |
|---|---|---|
| eggs | 4 large | Sets and thickens the filling |
| brown sugar | 3/4 cup packed | Adds caramel depth |
| butter / salt | 1 cup melted / add 1/4 tsp if unsalted | Prevents dry spots and balances sweetness |
Tools and Prep for a No-Stress Bake
Good news: you only need one reliable baking dish and about 20 minutes of hands-on time to set this up. A little care now makes serving and slicing tidy later.
Pick the best pan
I use a 9×13 baking dish every time. It gives the right thickness and makes clean scoops easy. That size hits the sweet spot for bake time and texture.
How I prep it
Coat the prepared baking dish with generous cooking spray or swipe butter into every corner. That prevents sticky caramel from clinging to the sides.
- Materials: glass or ceramic both work—watch browning and adjust a few minutes if needed.
- Tools: mixing bowl, whisk, measuring cups and spoons, spatula, and foil for tenting.
- Set the oven to 350°F before you start so things move quickly.
| Item | Why it matters | Tip |
|---|---|---|
| 9×13 pan | Even thickness and easy slices | Use this size for consistent results |
| Prepared dish | Prevents sticking | Spray or butter every corner |
| Towel | Protects counters | Set hot dish on a towel after baking |
Keep it relaxed—this is low-equipment baking and anyone can make it shine.
Step-by-Step Pecan Pie Dump Cake Recipe
Get the oven hot and the dish ready—this is where the real layering magic begins.
Preheat and prep
Preheat the oven to 350°F and grease a 9×13 pan. I like to swipe butter into the corners so nothing sticks.
Make the filling
Whisk 4 eggs, 3/4 cup corn syrup, 3/4 cup brown sugar, 2 tbsp cream, 2 tsp vanilla and 1/2 cup melted butter until glossy and the sugar looks dissolved.
Stir in pecans
Fold about 2 cups pecans into the filling so every bite gets nuts. Pour the mixture into the prepared pan.
Top without stirring
Evenly sprinkle the cake mix and chosen spice across the surface. Do not stir—trust the layers.
Drizzle butter and finish
Slowly drizzle the remaining 1/2 cup melted butter in thin lines to prevent dry spots. Scatter reserved pecans on the top for crunch and classic looks.
| Step | Time | Why it matters |
|---|---|---|
| Preheat & prep | 5 minutes | Ensures even baking and easy release |
| Whisk filling | 5–7 minutes | Creates glossy, custard-like base |
| Layer & top | 5 minutes | Layers give two textures after baking |
Baking Time, Foil Tenting, and Doneness Cues

Nailing the minutes in the oven is the trick that saves your surface from racing ahead of the filling. I’ll walk you through a realistic bake range and simple checks so you stop guessing and start serving confidently.
Why a mid-bake cover helps
Start at 350°F and bake uncovered for about 20 minutes so the top begins to brown. Then tent loosely with foil and continue baking to let the center catch up without burning the surface.
Clear doneness cues to watch for
Look for a lightly golden top and no visible dry mix. The center should have a slight jiggle—not liquid slosh but a gentle wobble like a classic custard.
- Typical range: 40–45 minutes total in most ovens; some dishes need up to 50–60 minutes.
- Check edges first—when they are deeply golden and bubbling, you’re close.
- Carryover heat during resting finishes the set; don’t overbake to crush the gooey goodness.
| Phase | Minutes | What to look for |
|---|---|---|
| Uncovered | ~20 | Top starts to brown |
| Tent with foil | ~20–25 | Center firms without darkening top |
| Total | 40–60 | Golden top, no dry mix, slight jiggle |
Cooling and Serving for the Best Gooey-Slice Moment
Letting this bake rest does more than cool it—it finishes the filling into perfect, sliceable squares. A short pause keeps warm, molten spoonfuls easy to serve, while a longer rest gives tidy portions for guests.
Why resting time matters for cleaner slices
Cool at least 15 minutes for a warm, gooey serving. The filling will thicken as it cools and hold together better when scooped.
For clean, party-ready slices, wait 30–45 minutes. That extra time firms the center so knife cuts show neat layers and less sticky residue on the plate.
Best toppings: vanilla ice cream and caramel sauce
Serve with a scoop of vanilla ice cream for contrast—cold and creamy meets warm, crisp top. Drizzle a little caramel sauce to go big; it’s optional but glorious.
Tip: wipe a sharp knife between slices for the prettiest presentation and to keep edges defined.
| Serving Option | Cool Time | Why Choose It |
|---|---|---|
| Warm scoop | 15 minutes | Molten filling, spoonable comfort; pairs with vanilla ice cream |
| Room-temp slice | 30–45 minutes | Cleaner cuts for sharing; caramel sauce adds a restaurant touch |
| Make-ahead | Cool fully then refrigerate | Easier transport and neat squares for events |
Ingredient Swaps and Dietary-Friendly Options
Swapping a few ingredients can keep the classic texture while making this treat work for more diets and tastes. Below I show pantry-friendly swaps that still yield a glossy, set filling and a golden top.
Corn syrup alternatives that still keep the filling sticky
Use maple syrup or brown rice syrup in place of corn syrup for similar viscosity and flavor. Honey works in a pinch but will add floral notes.
Why it works: you need a thick liquid sweetener to stop the filling from crystallizing and to keep the center glossy as it bakes.
Easy mix-ins: chocolate chips, bourbon caramel, or a pinch more spice
Add a cup of chocolate chips for melty pockets, or swirl in a little bourbon caramel for grown-up depth. An extra pinch of spice amps holiday warmth without changing technique.
Cake mix variations for different moods
Swap the standard cake mix for spice cake mix to lean into fall flavors. Butter pecan mix deepens the nut profile, and a gluten-free yellow cake mix keeps it friendly for guests with sensitivities.
Dairy tweaks: heavy cream swaps and butter adjustments
Replace heavy cream with full-fat coconut milk if you need dairy-free cream—expect a faint coconut note. Use salted butter for convenience, or unsalted plus 1/4 tsp salt to control seasoning.
| Swap | Effect | Tip |
|---|---|---|
| Maple or brown rice syrup | Sticky, caramel notes | Use 1:1 for corn syrup |
| Chocolate chips / bourbon caramel | Melty pockets / boozy depth | Stir into filling before pouring |
| Spice cake mix / gluten-free yellow cake mix | Warmer spice / dietary-friendly | Keep topping method unchanged |
| Coconut milk for cream | Dairy-free creaminess | Use full-fat for best set |
Texture and Sweetness Adjustments (So It’s Not Too Goopy or Too Sweet)

If your center runs when you cut it, don’t panic. I’ll walk you through short fixes that keep the rich filling but make slices neat.
How to firm it up with bake time and cooling time
If the middle is underdone, add 5–10 more minutes of baking at 350°F. Check after each 5 minutes so the top does not overbrown.
After baking, let the pan rest at least 30 minutes. Longer cooling helps the filling set and makes clean slices easier.
Ways to balance sweetness without losing pecan pie flavor
To cut cloying sugar, reduce brown sugar by 1–4 tablespoons or swap corn syrup for maple or brown rice syrup. Both mellow the sweetness while keeping gloss in the filling.
- Add a pinch of salt and an extra teaspoon of vanilla to round flavors.
- Stirring the dry mix into the filling will wreck the texture—leave layers alone.
- More chopped nuts reduce goo and add bite if you prefer less syrupy texture.
| Issue | Fix | Typical minutes |
|---|---|---|
| Runny center | More baking + cool | 5–10 minutes |
| Too sweet | Less sugar or milder syrup | Adjust to taste |
| Top browning fast | Tent with foil mid-bake | 20 minutes uncovered, then tent |
How to Store, Freeze, and Reheat Dump Cake
A little planning after the bake keeps the topping crisp and the center perfectly gooey. Below I give clear, practical timelines and steps so your leftovers behave the way they did straight from the oven.
Room temperature vs. fridge timelines
Cover the baking dish tightly with foil or plastic wrap and keep at room temp up to 2 days for casual snacking. This is great when the dessert will disappear fast.
For longer freshness, refrigerate the covered dish for up to 4 days. The filling firms in the fridge, which makes slices neater but less gooey until you warm them.
Freezing individual slices
Slice into portions first. Wrap each piece tightly in plastic and then foil, or use airtight containers. Freeze up to 2 months.
Thaw wrapped slices overnight in the fridge. This prevents watery separation and keeps the texture steady.
Reheating to revive that buttery top
- Microwave: 20–30 seconds for a single slice (quick, gooey comfort).
- Oven: place slices in a baking dish and warm at 350°F for 8–12 minutes to crisp the top and melt the center.
- If reheating from frozen, add a few minutes and cover loosely with foil to avoid over-browning.
| Storage method | How long | Why choose it |
|---|---|---|
| Room temp (covered) | Up to 2 days | Best for quick serving and soft topping |
| Refrigerator | Up to 4 days | Cleaner slices; filling firms |
| Freezer (individual) | Up to 2 months | Easy grab-and-reheat portions |
Tip: If your baking dish fits in the fridge, leaving it whole saves cleanup. But if space is tight or you want ready-to-go portions, slice and wrap first—future you will thank you.
Make It, Share It, and Keep the Dessert Magic Going
One pan, a few pantry staples, and you’ve got a cake that earns repeat invites. Make it warm, top with ice cream, and watch people line up for seconds.
This is the kind of pie-style comfort that shines at potlucks. Bring the crunch and gooey center and you’ll be the guest everyone remembers. Try halves or chopped nuts for a different look and bite.
Quick success formula: smooth filling, even cake layer, full butter coverage, tent with foil if the top races, and patience while it cools. Next time, play with spice cake mix, chocolate-studded fillings, or a bourbon-caramel drizzle.
I love seeing how you make this your own—leave a rating or comment and tell me how your baking turned out. You’ve got this; go make something delicious.