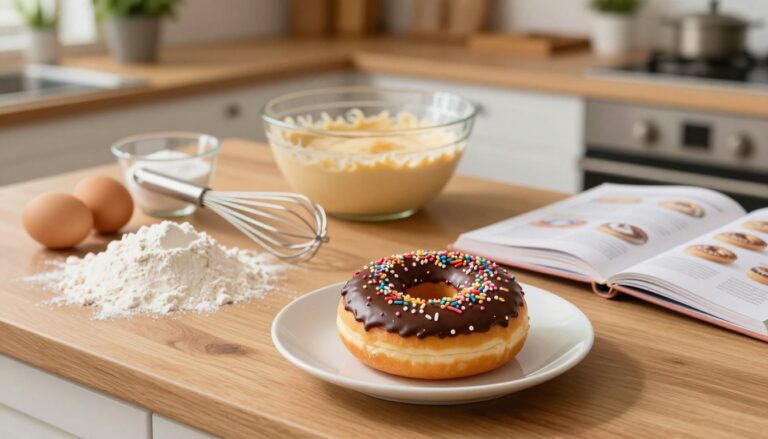
No Bake Eclair Cake Recipe
I’ll start with the basics: this No Bake Eclair Cake Recipe is a dreamy, layered icebox dessert that eats like a soft slice of cake without firing up the oven. It’s built from graham crackers, creamy pudding, and a glossy chocolate topping that gets better after a night in the fridge.
Think quick assembly now and the refrigerator does the “baking” later, softening crackers into tender, cake-like layers. Minimal prep, common pantry items, and a make-ahead format make this perfect for potlucks and busy weeks.
You’ll get two topping paths: a microwave-and-pour chocolate frosting shortcut or a simple ganache. Both are fast and forgiving, so you can choose based on time and tools.
Why you’ll love it: it’s light, creamy, and disappears fast (so plan for seconds). Ahead I’ll cover ingredients, tools, step-by-step layering, topping choices, chill time, pro tips, and fun variations to make it your own.
Why This No-Bake Eclair Cake Is a Go-To Dessert for Any Occasion
If you need a crowd-pleaser that travels well and vanishes fast, this is it. I bring it to church potlucks, backyard picnics, and office parties because people actually ask where I got it.
The secret is patience: after an overnight chill the layers meld and the whole thing truly tastes like a soft slice of cake, not just stacked crackers and pudding. That rest turns a quick assembly into a texture miracle.
The filling stays light and creamy, so guests reach for seconds without feeling weighed down. Using semi-sweet chocolate on top keeps the finish balanced and less cloying, which helps when you serve mixed crowds.
A classic potluck favorite that tastes even better the next day
- Dependable and portable — easy to cover and carry.
- Overnight chilling improves texture and flavor.
- Famous for disappearing; double it if you want leftovers.
| Feature | Why it Matters | Best Practice |
|---|---|---|
| Travel | Holds shape and survives transit | Chill fully and transport in a flat container |
| Sweetness | Semi-sweet topping keeps it balanced | Use semi-sweet ganache for mixed tastes |
| Texture | Soft, cake-like after resting | Refrigerate 8–12 hours for best results |
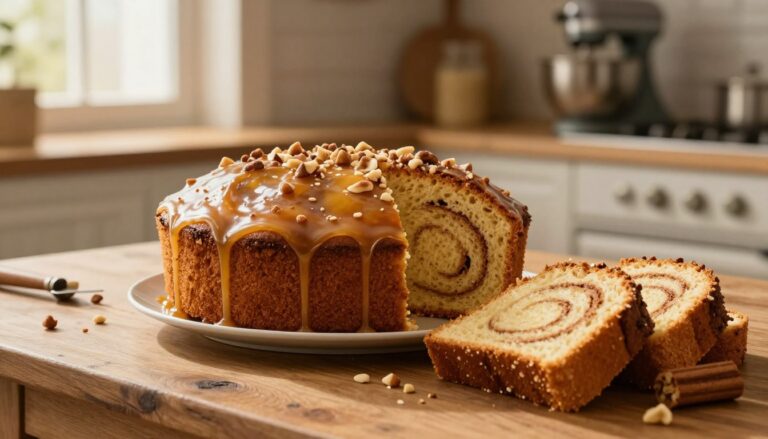
Think of it as a portable chocolate eclair cake in layered form: vanilla pudding, whipped filling, and glossy chocolate on top. It checks all the potluck boxes — easy, crowd-friendly, and delicious.
Ingredients You Need for Layered Graham Crackers and Vanilla Pudding
Gathering the right pantry staples makes layered graham-and-pudding magic happen fast. Below I list what to buy and why each item matters for texture and ease.
Instant vanilla pudding mix, milk, and whipped topping essentials
Two 3.4-ounce boxes of instant vanilla pudding mix make the filling quick to set. Use 3 cups milk to get the right consistency; less makes it stiff, more makes it loose.
Fold in 8 ounces thawed whipped topping for an airy, mousse-like filling that spreads easily between layers.
Graham crackers for every layer (how many you’ll actually use)
Plan on a full 14.4-ounce sleeve of graham crackers. You’ll break a few to fit edges — that’s normal. The crackers soften into cake-like layers as they chill.
Chocolate topping options and easy swaps
- Quick path: 16 ounces canned chocolate fudge frosting — melt-and-pour for a glossy finish.
- Less sweet: make chocolate ganache with semi-sweet chocolate for balance.
- Swaps: use chocolate graham crackers or chocolate pudding mix for a richer twist.
| Option | Sweetness | Best Use |
|---|---|---|
| Chocolate fudge frosting | High | Fast, glossy finish |
| Semi-sweet ganache | Balanced | Less-sweet, refined top |
| Chocolate pudding swap | Richer | Triple-chocolate variation |
These ingredients are pantry staples in the U.S., so you can assemble confidently and get neat, sliceable layers every time.
Kitchen Tools That Make Assembly Fast and Clean

Simple gear and a little planning save time and give you neat, sliceable layers. I keep this process blissfully short: one good mixing bowl, a whisk, and a spatula. That’s it.
Mixing bowl and whisk for a smooth pudding mixture
Start by whisking the pudding mixture in a single bowl. Whisking aerates the mix and helps the mixture thicken faster and smoother. You don’t need perfect peaks—just a lump-free, spreadable texture.
Why a 9 x 13 pan works best for clean layers
A 9 x 13 pan is the sweet spot for neat layers and even chilling. It gives you tidy slices that look intentional, not slapdash. Build and chill right in the pan to cut cleanup time.
- I use one bowl, a whisk, and a spoon or spatula—no sink full of dishes.
- Assemble in about 30 minutes, then chill overnight for best texture (assembly is the quick part).
- An offset spatula helps smooth the top, but a butter knife works fine—no fancy gear guilt here.
- Mix first, then layer in the pan to keep everything tidy and fast.
| Tool | Why it Matters | Quick Tip |
|---|---|---|
| Mixing bowl | Holds and lets you mix the pudding mixture easily | Mix in one bowl to save dishes |
| Whisk | Thickens mixture smoother and faster | Whisk 2–3 minutes until lump-free |
| 9 x 13 pan | Creates even layers and clean slices | Assemble right in the pan; chill flat |
| Offset spatula / knife | Smooths edges for a polished look | A butter knife works if you don’t own one |
Want a full walkthrough? Check the full step-by-step guide for detailed timing and tips that help the whole process feel effortless.
No Bake Eclair Cake Recipe: How to Assemble the Perfect Layers
Follow a steady rhythm of crackers and filling, and you’ll end up with perfect, even slices every time. I walk you through each move so it stays calm and foolproof.
First, whisk the instant pudding mix and milk until the mixture thickens. You’re looking for pudding that mounds slightly and doesn’t run like milk—about 2–3 minutes of brisk whisking.
Gently fold whipped topping into the thickened pudding until the filling is light and even. Folding keeps the air in and gives a fluffy texture that spreads easily between layers.
- Line the 9 x 13 with graham crackers for the bottom. Break sheets to fill edges; don’t stress tiny gaps—the filling fills them as it chills.
- Spread half the pudding mixture edge-to-edge so corners soften evenly and you avoid crunchy bites.
- Add another layer of crackers (rotate direction for sturdier slices), then spread the remaining filling and repeat if needed.
- Finish with a flat top layer—you may need extra crackers to cover the pan fully. A flat top supports the chocolate topping best.
| Step | Why it Matters | Quick Tip |
|---|---|---|
| Whisk until thick | Ensures filling sets | Look for gentle mounds |
| Fold whipped topping | Keeps filling airy | Use a spatula and gentle strokes |
| Rotate crackers | Stronger slices | Turn direction each layer |
Once layered, warm your chosen frosting and pour over the flat top. Refrigerate at least 8 hours, ideally 12, for the crackers to soften into cake-like layers and for cleaner slices.
Chocolate Topping: Frosting Hack vs Ganache (Both Taste Like a Dream)
What you put on top changes the vibe—from speedy and sweet to slightly grown-up and glossy. I’ll walk you through three easy topping moods so your finish matches the crowd and the time you have.
Microwave-and-pour chocolate frosting in minutes
For fastest results, microwave canned chocolate fudge frosting in 30-second bursts. Stir after each burst and stop when it becomes pourable. Pour or spread evenly over the flat top and refrigerate to let the frosting firm up.
Semi-sweet chocolate ganache for a less-sweet finish
Want something less sugary? Heat cream, pour it over chopped semi-sweet chocolate, let sit one minute, then whisk to a glossy ganache. Semi-sweet chocolate balances the sweet pudding layers and yields a smooth, sliceable topping after a full chill.
Optional old-school homemade chocolate frosting
For a nostalgic, fudgy top, melt 3 Tbsp butter with 3 Tbsp water. Whisk in 3 Tbsp cocoa. Stir in 1 to 1½ cups powdered sugar until pourable. Spread and chill till set.
- Quick: canned chocolate frosting = ready in minutes and fuss-free.
- Refined: ganache = balanced, glossy, great with homemade cream fillings.
- Classic: butter-cocoa frosting = nostalgic and fudgy.
| Method | Speed | Finish |
|---|---|---|
| Canned frosting | Very fast (minutes) | Glossy, firms in fridge |
| Semi-sweet ganache | Moderate (heat and whisk) | Silky, less sweet, sliceable |
| Old-school frosting | Fast to moderate | Fudgy, nostalgic texture |
Chill Time, Texture, and When It’s Ready to Slice
Chilling is where the dessert truly transforms from stacked crackers into a sliceable, tender treat.
Why refrigerator time matters for soft graham crackers
The refrigerator lets moisture from the filling migrate into the graham crackers. Over hours the sheets soften and bond with the pudding and whipped topping. That change creates a cake-like texture that slices cleanly.
Best results at 12 hours (and what happens at 8 hours)
Plan for at least 8 hours, but 12 hours is the sweet spot. At 8 hours the layers are tasty but the crackers can stay a bit crisp and resist the knife.
After 12 hours the layers are tender and the top topping firms for neater slices. This extra time makes serving effortless and less messy.
- Make it the night before: assemble in the evening, chill overnight, serve the next day.
- If short on time: 8 hours works in a pinch, but slicing may be firmer.
- Chill also helps ganache or frosting set so slices look polished.
| Chill Time | Texture | Cutting Notes |
|---|---|---|
| 8 hours | Semi-soft | May resist knife; use a sharp blade |
| 12 hours | Soft, cake-like | Clean slices; topping set |
| 24 hours | Very tender | Even easier slicing; holds shape if chilled |
Pro Tips for a Sliceable Chocolate Eclair Cake
A few clever tricks will give you neat, photo-ready slices every time. These tips focus on structure, texture, and a smooth top so your chocolate eclair cake looks and slices like it came from a bakery.
Rotate the direction of each layer
Turn the crackers 90 degrees with every new layer. That simple move locks layers together so the finished dessert holds like a real cake.
Don’t stress small lumps in the pudding
Whisk until mostly smooth, but tiny lumps won’t ruin anything. Once the pudding chills, the texture evens out and nobody notices.
Spread filling to the edges
Push the filling fully to the pan sides. This prevents dry corners and makes each bite soft and even.
Get a smooth top without tearing crackers
Pour warmed frosting or ganache over the flat top. Let it settle, then gently nudge with a butter knife or offset spatula to level. No scraping—just soft guidance.
- Slice like a pro: sharp knife, warm under hot water, wipe between cuts, and serve cold.
- These small steps yield sturdier structure and prettier slices that make guests ask for the method.
For a step-by-step visual, check this helpful guide: classic eclair-style layered dessert.
| Tip | Why it Helps | Quick Action |
|---|---|---|
| Rotate layers | Stronger slices | Turn crackers each layer |
| Edge coverage | No dry corners | Spread filling to edges |
| Smooth top | Clean presentation | Pour then nudge gently |
Easy Variations and Flavor Twists to Try Next
Try a few flavor swaps and this layered dessert becomes a playground of chocolate and caramel.
I like a triple chocolate path when I want big flavor with no extra work. Swap vanilla pudding for chocolate pudding, use chocolate graham crackers for the layers, and finish with a semi-sweet chocolate topping. It stays sliceable and feels decadent without changing the method.
For a caramel-delight spin, keep the chocolate top, drizzle a light caramel between layers, and sprinkle toasted coconut on the final layer. Toast the coconut lightly so it adds crunch without sogginess.
Want lighter or richer? Use homemade whipped cream (whip heavy cream with a touch of sugar and vanilla) for a fresher, richer finish. Or swap in stable whipped topping to make the dessert travel-friendly and ultra make-ahead.
- Balance sauces: thin caramel needs less quantity—use a ribbon, not a flood.
- Choose semi-sweet chocolate to avoid an overly sweet result.
- Treat the base as a template—rifting is encouraged for holidays and parties.
| Variation | Key Swaps | Result |
|---|---|---|
| Triple chocolate | Chocolate pudding, chocolate graham crackers, chocolate topping | Deep chocolate flavor, cake-like texture, balanced with semi-sweet chocolate |
| Caramel-delight | Caramel drizzle, toasted coconut, chocolate frosting top | Cookie-bar vibe with crunch and sweet-salty contrast |
| Light vs rich | Whipped topping (stable) or homemade whipped cream (richer) | Stable for travel; richer and fresher when made at home |
Serving and Storing Your Make-Ahead Eclair Cake

Portioning and storing this chilled treat is half the fun—especially when guests come back for seconds. I slice straight in the pan for the cleanest look and the least fuss. A sharp knife warmed under hot water makes neat cuts. Wipe the blade between slices to keep edges tidy.
How to portion for potlucks, picnics, and family gatherings
Cut into smaller squares for events. These bites are rich but light, so smaller portions mean more people can sample. Bring a sturdy serving spatula—those soft layers need support when transferring to plates.
Cover and refrigerate for 3 to 4 days (best texture window)
Keep the pan tightly covered and refrigerate. The ideal window is 3–4 days for tender, softened layers. After that the texture shifts and flavors can dull.
Why leftovers disappear fast—and how to plan for seconds
People will go back for more. If you’re feeding a crowd, consider making two pans or doubling the filling. The good news: this dessert travels and tastes even better after a night in the fridge.
| Action | Why | Quick Tip |
|---|---|---|
| Small squares | Fits many tastes | Cut 2×2-inch pieces |
| Tight cover | Prevents drying | Wrap with plastic wrap |
| Serve cold | Topping stays sliceable | Keep refrigerated until serving |
Make It Tonight, Chill Overnight, and Bring the Dessert Everyone Requests
Assemble it tonight, tuck the pan into the fridge, and show up tomorrow with a dessert that looks like you spent hours on it.
The one non-negotiable: give it a long chill (about 12 hours) so the layers soften and the chocolate top sets for clean, tidy slices.
If this is your first go, breathe easy—if you can whisk pudding and stack crackers, you’ve got this. Choose the quick frosting hack for speed or a semi-sweet ganache for a less-sweet finish; both taste fantastic.
This is the kind of eclair-style favorite people request again and again, so don’t be surprised when you’re asked to bring it next time.