Lemon Cream Cheese Dump Cake Recipe
I love simple baking wins, and this layer-and-bake lemon dessert is one of my favorites. It’s a true dump-and-bake moment: spread the lemon filling, sprinkle cake mix, tuck in cubed cream cheese, dot with butter, then bake. The whole thing comes together fast and feels like sunshine on a plate.
Expect a gooey lemon base, a buttery cobbler-style top, and little pockets of soft cream cheese in every scoop. You don’t need a mixer or a dozen bowls—just a square baking dish and about an hour from start to finish.
I’ll walk you through what to buy, how long to bake, and how to tell when it’s done so nothing is left to guesswork. For substitutions, make-ahead tips, and smart storage, see this detailed guide: layer-and-bake method.
Why This Lemon Dump Cake Is the Easiest Crowd-Pleasing Dessert
This one-pan wonder wins every time when guests arrive unexpectedly. It takes about an hour from start to finish, so you can truly pull it together at the last minute and still look like a hero.
What makes a “dump” dessert so simple
Everything is layered straight into the baking dish. No creaming, no bowls to wash, and no worrying about overmixing. The method gives a soft, cobbler-like top while the base stays spoonable and bright.
Tangy filling and pockets of soft texture
The tart filling keeps each bite lively. Cubed cream cheese melts into little creamy pockets that cut the tartness and add luxury without fuss. The contrast is what makes people go back for seconds.
When to make it and how to serve
Make it for a weeknight sweet, a surprise guest, or a potluck where tidy, shareable desserts win. Serve warm or room temperature with a scoop of vanilla ice cream for extra applause.
- Small crowd: use an 8×8 square pan.
- Party size: a 9×13 pan feeds more and gets everyone to the table faster.
- Tip: let it rest 10–20 minutes so slices hold together better.
| Pan Size | Serves | Use When |
|---|---|---|
| 8×8 | 4–6 | Family dessert, small dinner |
| 9×13 | 8–12 | Potlucks, parties |
| Round 9-inch | 6–8 | Casual get-together, looks nice on a table |
Ingredients You’ll Need for Bright Lemon Flavor

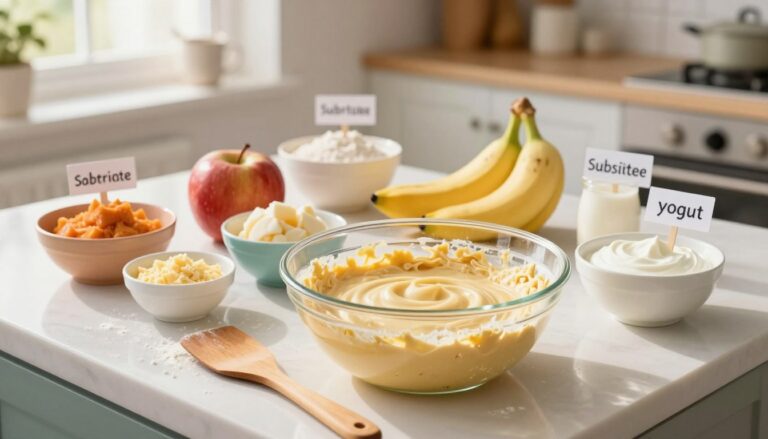
A short, smart shopping list is all you need to deliver big citrus flavor with almost no fuss. Below I break down the choices so you can pick what fits your pantry and taste.
Lemon pie filling or lemon curd: choosing what’s available
Canned lemon pie filling is the classic, easy route. It gives consistent sweetness and a smooth base. If you want more fresh citrus punch, swap in high-quality lemon curd (Trader Joe’s or Bonne Maman are great picks) for a brighter, more authentic tartness.
Cake mix options
Use a box of cake mix that matches how bold you want the top to be. Lemon cake mix doubles down on citrus. Yellow cake mix gives a nostalgic, sweet backdrop. White or vanilla keeps the lemon filling in the spotlight.
Cream cheese formats
Cubed blocks create little creamy pockets. Slices make wider, cheesecake-like patches. Or whip the block with an egg, zest, juice, and vanilla for a luscious baked layer that feels fancy but is still simple.
Butter and optional add-ins
Use cold butter, sliced or patted into thin pats. Thin cold pats melt evenly and stop the dry cake mix from leaving dusty spots. For extras, consider lemon zest for punch, white chocolate chips for sweetness, berries for freshness, crushed graham crackers for crunch, or nuts for texture.
- Sweetness tip: if the filling is very tart, a slightly sweeter mix balances it; if the filling is very sweet, add zest to lift the flavor.
- These ingredients are flexible—most swaps are safe and won’t change bake time much.
| Ingredient | Why it matters | Quick swap |
|---|---|---|
| Pie filling / curd | Base flavor and texture | Lemon curd for brighter flavor |
| Cake mix | Top texture and sweetness | Yellow or vanilla for milder taste |
| Cream cheese format | Creamy pockets vs. layered texture | Whipped mix for cheesecake feel |
Want guidance on layering and technique? I walk through the full layer-and-bake method here: layer-and-bake method.
Tools and Baking Dish Setup for Easy Cleanup
Start with the pan that matches your crowd size and watch how the bake time and texture fall into place. The right baking dish makes slicing, serving, and cleanup so much simpler. I keep this step low-fuss and honest: pick what fits your oven and appetite.
Choose the best pan
Use an 8×8 square baking dish for a smaller household dessert. Choose a 9×13-inch baking dish when you’re feeding a crowd or want leftovers that reheat well.
Quick prep for no-stress cleanup
Spray the dish generously with nonstick spray or rub with butter so the citrusy bottom layer doesn’t glue to the corners. Smooth and spread lemon filling all the way to the edges—no dry corners, please.
- How pan size affects thickness: larger pan = thinner layers; smaller pan = gooier center.
- Tools you need: a spoon or spatula to smooth, and a knife to slice butter; a mixer is optional.
- Mess prevention: set the dish on a rimmed baking sheet if your filling bubbles over.
| Pan | Size | Result |
|---|---|---|
| Square baking dish | 8×8 | Thicker, gooier center |
| Rectangular baking dish | 9×13 | Thinner layers, more topping per bite |
| Prep tip | Nonstick spray or butter | Easy release and cleaner bottom |
How to Make Lemon Cream Cheese Dump Cake Recipe Step by Step
Grab a baking dish and set the oven to work—this method makes the whole process effortless. I’ll walk you through the exact order so nothing is guessed and the bake comes out reliably gooey and golden.
Preheat and prep
Preheat oven to 350°F and grease the pan well. This prevents sticking and saves cleanup time.
Layering the base
Spoon the lemon filling into the dish and spread to the corners for an even base. For patterns, try: (a) pie filling → cake mix → cubed or sliced cream cheese → remaining cake mix → cold butter pats, or (b) curd → whipped cream cheese layer → cake mix → butter slices.
Top and bake
Gently “snow” the dry cake mix over the surface so the top is even. Dot with thin, cold butter slices to stop dry spots. Bake 35–45 minutes until the edges bubble and the top turns light golden. Use a toothpick in the center if you want extra reassurance.
Rest before serving
Let it cool 10–20 minutes so the filling firms and slices hold. If any dry patches show late, brush melted butter over them in the final minutes of baking.
| Pan Size | Bake Time (minutes) | Result |
|---|---|---|
| 8×8 | 40–45 | Thicker, gooier center |
| 9×13 | 35–40 | Thinner, more crisp top |
| Round 9-inch | 37–42 | Even edges, pretty slices |
Serving Ideas That Make It Even More Delicious
Serving this bright, buttery bake three ways makes it feel new each time you bring it to the table. A quick choice — warm, room temperature, or chilled — changes the texture and the vibe of every spoonful.
Serve warm, room temp, or chilled: what changes in texture
Warm servings are gooey and saucy, perfect with a melting scoop on top. The filling flows and the top is soft and tender.
Room temperature gives a balanced bite: set but still tender. Chilled slices firm up and become almost like lemon bars met cobbler—great for make-ahead plans.
Best toppings to always keep on hand
My go-tos: a cloud of whipped cream for lightness, a nostalgic dollop of Cool Whip, or a generous scoop of vanilla ice cream for creamy contrast. For full citrus commitment, swap in lemon gelato.
Fruit pairings that say summer
Bright berries play nicely here. Blueberries add sweet pop, raspberries bring tart lift, and sliced strawberries make the plate feel festive. Scatter a few on top or serve them on the side.
- Plating tip: scoop ice cream and give a quick swoop with a spoon for a bakery look.
- Add a little lemon zest or a few berries for color and contrast.
- Serve warm for cozy nights, chilled for potlucks and days when you need make-ahead ease, and room temp when you’re grabbing a quick piece.
| Serve Temp | Texture | Best Pairing |
|---|---|---|
| Warm | Gooey, saucy | Vanilla ice cream |
| Room temp | Balanced, sliceable | Whipped cream |
| Chilled | Firm, bar-like | Fresh berries |
Want more ideas? Try other recipes that play with citrus and ice cream for seasonal twists. Enjoy—this one is forgiving and endlessly adaptable.
Make-Ahead, Storage, Freezing, and Reheating Tips

Make-ahead wins: this bright layered bake plays nicely with prepping, freezing, and fast reheats. Plan a little time now and you’ll have easy portions for several meals.
Refrigerator storage
Once cooled, cover the baking dish tightly or transfer slices to an airtight container. Because of the soft filling, keep it chilled and use within 4–5 days for best quality and safety.
Freezer method
Slice first, freeze pieces on a sheet until firm, then wrap each piece and store in a freezer bag. Properly wrapped, portions keep up to 3 months. Expect a small change in the creamy layer’s texture after thawing—that’s normal.
Reheating options
Microwave for quick comfort: 30 seconds at a time until warm and gooey. Or warm in a 350°F oven for about 10–15 minutes to revive a crisp top. Reheat time varies with portion size—watch for “warm and gooey,” not the clock.
- Keep leftovers in the baking dish for grab-and-go ease.
- Flash-freeze slices for single-serve thawing.
- If topping seems dry, add a sliver of butter before the final minutes in the oven.
| Method | Time | Notes |
|---|---|---|
| Refrigerator | 4–5 days | Keep covered in the baking dish or airtight container |
| Freezer | Up to 3 months | Slice, flash-freeze, then wrap individually |
| Reheat | Microwave: 30 sec bursts / Oven: 10–15 minutes | Use 350°F oven to crisp topping; adjust minutes by portion size |
Sweet, Zesty Variations to Bake Next Time
If you like quick bakes with big payoff, small swaps keep this one-pan favorite fresh. Try a different fruit filling: cherry, blueberry, peach, or pineapple all work with the same layer-and-bake method.
For peak summer energy, stir in about 1 cup fresh or frozen blueberries so you get juicy pops in every spoonful. Swap the boxed cake mix flavor to white, vanilla, or yellow for a milder top, or choose lemon for extra brightness.
Add texture with crushed graham crackers or chopped nuts on top. Sprinkle white chocolate chips over the dry mix for creamy sweetness that plays nicely with tart fruit.
Need dairy-free options? Use plant-based cream cheese and butter alternatives and bake the same way. One honest note: if texture matters, avoid boxed mixes that include pudding—some bakers find them too dense.