Jewish Apple Cake Recipe
I promise this is the kind of dessert where one slice becomes two. I’m talking a moist, dense, parve-style cake with cinnamon-sugar ribbons and a bright kiss of orange juice that makes your kitchen smell like a hug.
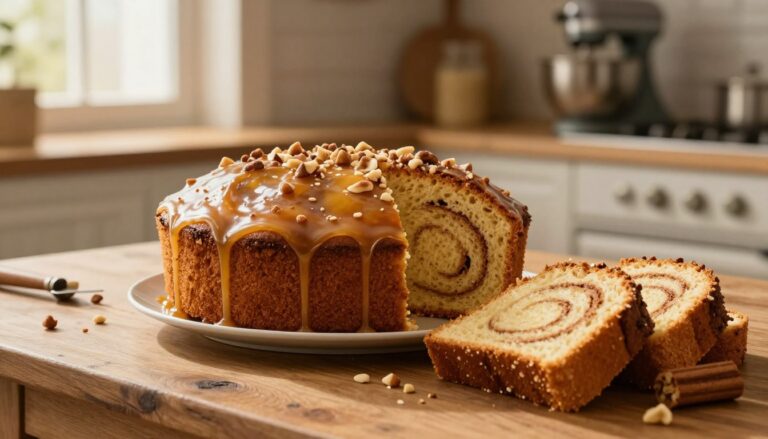
This recipe looks bakery-fancy but bakes easily in a tube pan, forming a crisp brown edge and that lovely “no frosting needed” finish. Expect a texture that’s pound-cake-meets-coffee-cake, packed with tender fruit and a cinnamon ripple that steals the show.
On this page you’ll get ingredients, step-by-step directions, pan tips, apple choices, and storage/freezing advice so you can bake confidently without hunting through the post. I’ll also include a quick nutrition note with calories, carbohydrates, and protein as estimates (not a lab report).
Later I’ll show key techniques: toss the fruit with flour, layer cinnamon sugar to the edges, and let the cake rest before unmolding to avoid cracks. I’ll keep it friendly and practical—because if we’re making cake, we should be excited about it!
Why This Jewish Apple Cake Is a Family-Favorite Dessert
One bite tells you why this old-school dessert keeps showing up at family tables. The texture is dense and tender, more like a pound loaf than a sponge, yet it hides gooey ribbons of cinnamon and sugar that cut across every slice.
Moist pound-cake texture with coffee-cake cinnamon sugar ribbons
The batter bakes into a firm, sliceable crumb that still feels moist. Layered cinnamon-sugar pockets melt into jams around the apples. That contrast — sturdy crumb and soft, spiced pockets — is what makes this version so comforting.
A hint of orange juice and a crisp, brown edge
Fresh orange juice adds a bright lift, not a citrus punch. It keeps the flavor lively and balances the sugar. Around the pan, the batter browns into a slightly crisp edge — the part everyone fights over.
No frosting needed: a cake that stands on its own
You don’t need a frosting hat here. The sweetness, spice, and juicy fruit make a complete dessert as-is. Serve it for brunch, potlucks, holidays, or a simple weeknight treat.
| Feature | What to Expect | Why It Matters |
|---|---|---|
| Texture | Dense, moist, sliceable | Slices hold up for sharing and make neat servings |
| Flavor | Cinnamon-sugar ribbons + subtle orange | Warm spice with a fresh lift keeps it from feeling heavy |
| Crust | Crisp, browned edge | Provides contrast and a coveted crunchy piece |
What Makes Jewish Apple Cake Different
I love how this version keeps things simple and sturdy. It swaps dairy for neutral oil, so the loaf stays moist for days and slices cleanly for sharing.
Parve baking basics
Parve means no milk and no butter, though eggs are often used. That makes this dessert easy to serve after meals that avoid dairy.
Why oil matters
Using oil instead of butter keeps the crumb dense but tender. Oil locks in moisture so slices don’t fall apart as the fruit softens.
Traditional pan and texture
It’s usually baked in a tube pan. The center tube helps heat reach the middle, so the tall loaf cooks evenly with no underbaked tunnel.
- Works well for dairy-free or mixed menus.
- Oil is the preferred fat for lasting moistness.
- Expect a dense, sliceable cake that pairs nicely with coffee.
| Choice | Effect | Notes |
|---|---|---|
| Butter | Richer flavor | Not parve; may shorten storage life |
| Oil | Moist, dense crumb | Best for parve baking and travel |
| Neutral fat | Subtle flavor | Choose mild olive or canola for balance |
Ingredients You’ll Need for Jewish Apple Cake Recipe
Before you measure a single cup, let’s gather the ingredients that make this loaf reliably tender and full of warm spice.
Shopping list (US cup measures)
- 2–3 cups sliced apples (about 3 medium)
- 2 cups all-purpose flour, plus 1–2 tbsp for tossing apples
- 1 1/2 cups sugar
- 2 tsp baking powder
- 1/2 tsp salt
- 2 large eggs
- 2 tsp vanilla
- 1/3 cup fresh orange juice
- 3/4 cup mild olive oil, or vegetable/canola oil
- 1/2 cup cinnamon-sugar blend (1/3 cup sugar + 2 tsp cinnamon)
Toss sliced apples in a bowl with 1–2 tablespoons of flour to absorb excess juice and avoid a soggy crumb. This simple step keeps the batter balanced and the loaf sliceable.
Why these staples matter
Flour and baking powder give structure and lift. Eggs and oil add richness and tenderness. Sugar and vanilla deliver aroma and flavor, while orange juice brightens the batter without making it wet.
| Ingredient | Function | Tip |
|---|---|---|
| Flour | Structure | Measure cups accurately; spoon and level |
| Oil | Moisture | Mild olive or canola for neutral flavor |
| Cinnamon-sugar | Layers & topping | Layer between batter for ribbons |
If you want more detail or a tested shopping checklist, I recommend this trusted variation for guidance: best apple cake guide.
Best Apples for Jewish Apple Cake
Picking the right fruit changes the whole loaf—texture matters as much as sweetness. I aim for slices that keep their shape during the bake so you get neat layers and a pleasing bite.
Fuji: sweet, crisp, and sturdy
Fuji apples are my top pick when you want slices that stay intact. They hold up in baking and add a friendly sweetness that plays well with cinnamon-sugar ribbons.
Honeycrisp + Granny Smith: balance sweet and tart
Mixing Honeycrisp and Granny Smith gives you juicy sweetness plus a tart lift. The contrast brightens each slice and keeps the loaf from tasting too heavy.
Slicing for even layers
Shoot for 1/4-inch half-moon slices — about 12 slices per apple. Consistent thickness = even bake time. If your slices are thicker, add a few minutes to the oven and check for doneness so the center isn’t undercooked.
- Fuji: sweet crunch and structure.
- Honeycrisp: juicy sweetness.
- Granny Smith: tart balance and bite.
| Choice | Texture | Flavor effect |
|---|---|---|
| Fuji | Holds shape | Sweeter, bakes firm |
| Honeycrisp | Juicy | Enhances sweetness |
| Granny Smith | Firm, tart | Brightens slices |
Equipment and Pan Prep for the Perfect Bake
The right equipment makes this loaf behave. I use a 10-inch tube pan with a removable bottom because the batter is dense and full of fruit. The center tube acts like a tiny chimney so the middle cooks without the edges overbrowning.
Why a 10-inch tube pan with removable bottom works best
A tube design gives even heat to the center. A removable bottom prevents heartbreak when you try to unmold a tall, moist cake. It’s the easiest route to a clean release.
Greasing the pan (including the center tube)
Grease every nook. Rub butter or brush oil on the bottom, sides, and that sneaky center tube. For extra insurance, dust with a light coating of flour after greasing.
- Don’t trust “nonstick” completely—always grease.
- Have a bowl and spoon ready; the batter is thick and needs firm spreading.
- Use a removable-bottom tube pan to cut the chance of cracks or stuck edges.
| Pan Type | Release Ease | Best Use |
|---|---|---|
| 10-inch tube pan (removable bottom) | High | Dense, fruit-filled loaf |
| Bundt (decorative) | Medium | Works, but stick risk |
| Springform | Low | Not ideal for this batter |
Preheat Oven and Mix the Batter

Get the oven humming early—this loaf wants steady heat more than impatience. Preheat the oven well ahead so the cake goes in to a stable temperature and bakes evenly.
Oven temperature choices and bake time expectations
You’ll see three common approaches: low and slow, mid, or a higher quick bake. Choose one that fits your oven personality and schedule.
| Temperature | Bake time | What to expect |
|---|---|---|
| 300°F | 90–105 minutes | Very even browning, gentle finish |
| 325°F | About 1.5 hour | Balanced rise and color |
| 350°F | 70–85 minutes | Faster bake, watch for edge browning |
Mixing method: stand mixer vs. by hand for thick batter
The batter is very thick and scoopable, not pourable. A stand mixer makes life easier and saves your arm.
Mixing by hand works fine with a sturdy spoon or spatula. Expect a little muscle and a satisfying bowl scrape mid-mix.
How to combine dry and wet ingredients smoothly
Sift or whisk flour, baking powder, and sugar in one bowl to avoid pockets. In another bowl, beat eggs, oil, vanilla, and orange juice until combined.
Fold wet into dry just until cohesive, scraping the bottom so no flour hides. Overmixing stiff batter will tighten the crumb.
Layering Batter, Apples, and Cinnamon Sugar in the Pan
Layering this loaf is where the magic turns simple batter into a ribboned marvel.
Start by greasing the pan well (including the center tube). Add half the batter, then sprinkle one-quarter of the cinnamon‑sugar all the way to the edges. Dusting the rim ensures every slice gets spice, not just the middle.
Creating even cinnamon-sugar “ribbons” to the edges
Portion the cinnamon-sugar in a bowl first — divide into four equal piles or roughly a quarter cup each. This stops you from running out before the top.
Two-layer method with apples in the middle and on top
Add half the apples over the first cinnamon layer, press gently, then repeat: batter, cinnamon, apples. Finish with the remaining apples arranged in a neat circle on the top for a “wow” finish.
Alternative layering with thinner batter layers
Prefer more apple in every bite? Layer in thirds: batter, apples, cinnamon; repeat two more times. Thinner batter layers give frequent ribbons and more even fruit distribution.
- Use a spoon or spatula to spread the thick batter gently — it’s normal for this cake recipe to be scoopable, not pourable.
- Push cinnamon sugar to the pan edges so the flavor reaches each slice.
- Arrange top apples in a tidy circle for presentation and even baking.
| Method | Result | Tip |
|---|---|---|
| Half-and-half | Bold center ribbons | Portion sugar into a bowl first |
| Thirds | Even apple dispersion | Spread thinner batter layers gently |
| Top arrangement | Attractive finish | Press slices lightly so they don’t float |
Layering right will save you time in cleanup and extra praise at the table. I promise the rhythm batter → sugar → apples makes a reliably beautiful loaf every bake time.
Baking Time, Doneness Tests, and Avoiding a Dry Cake
This stage decides whether your loaf comes out moist and tender or dry and apologetic. Give the batter steady heat and a little patience—this loaf bakes longer than many because it’s dense, full of fruit, and tall in a tube pan.
Typical windows and when to start checking
300°F: plan 90 minutes to 1 hour 45 minutes; start checking at 90 minutes.
325°F: about 1 hour 30 minutes.
350°F: 70–85 minutes; watch the edges.
Doneness cues and tester tips
Insert a toothpick or cake tester into the thickest part. Clean or mostly clean with a few moist crumbs = done. If wet batter clings, give it more minutes before checking again.
- Avoid overbaking — carryover heat will finish the center after you remove it.
- Fat from oil helps keep the crumb moist; don’t bake it into submission.
- If the top browns too fast, move the pan lower or tent loosely with foil and keep baking until the center tests right.
| Temp | Range | Check |
|---|---|---|
| 300°F | 90–105 minutes | Start at 90 minutes |
| 325°F | About 1 hour 30 minutes | Check at 80–90 minutes |
| 350°F | 70–85 minutes | Watch after 70 minutes |
Cooling and Removing the Cake Without Cracks

Letting the loaf rest is the quiet trick that keeps it intact and attractive. After the oven timer dings, move the pan to a wire rack so air circulates under and around the pan. This prevents steam from collapsing the crumb and gives the interior a chance to set.
Resting time on a rack before unmolding
Give the pan 15–20 minutes on the rack. Fifteen minutes works if you’re careful; twenty minutes is gentler and safer for a tall, fruit-filled loaf.
Inverting safely onto a plate, then back onto a wire rack
Place a plate over the top, press gently, and flip confidently. Remove the outer pan (and the removable bottom, if you have one) so the loaf sits on the plate. Then invert again onto the rack so the top ends up on top. This two-step flip keeps the top looking lovely.
Loosening tips: knife around edges and releasing a removable-bottom pan
Run a thin knife or offset spatula around the outer edge and along the tube before inverting. If the pan has a removable bottom, push the base out while the loaf rests; that reduces side pulling and cracking.
- If the loaf resists, stop and loosen more—forcing it causes craters.
- Work calmly: a small extra minute or two of rest is better than a rushed unmold.
- A properly cooled loaf slices cleaner and stays prettier for several days of snacking.
| Step | What to Do | Why It Helps |
|---|---|---|
| Rest on wire rack | 15–20 minutes | Sets crumb and reduces sticking to pan |
| Loosen edges | Run knife around tube and side | Prevents sides from tugging and cracking |
| Invert twice | Flip onto plate, remove pan, flip to rack | Keeps the top intact and helps release the pan cleanly |
| If stuck | Loosen more; wait a few extra minutes | Less damage than forcing a stuck loaf |
For a tested variation and timing reassurance, you can refer to the best apple cake guide for extra pointers on pan handling and rest time.
Storage, Make-Ahead, and Freezing Tips
A little foresight turns this loaf into a week-long delight instead of a one-day scramble. I’ll walk you through when to keep it at room temperature, when the fridge makes sense, and how to freeze slices or the whole loaf so you always have dessert ready.
Room temperature vs. refrigerator
On the counter, wrapped in foil, the loaf keeps beautifully for up to four days. That works well if your kitchen stays cool and you want a tender crust that doesn’t go soggy.
If your house is warm or you prefer longer storage, refrigerate for 4–5 days. Chilling tightens the crumb slightly but slows spoilage when apples and oil are involved.
Why foil beats plastic
Foil lets the loaf breathe just enough to avoid trapped moisture. Plastic tends to hold wetness against the surface and can soften the crust over time.
Use foil for room-temp storage and for freezing outer protection after a tighter wrap.
Freezing whole or by slice
- Wrap individual slices in plastic wrap, then a layer of foil to prevent freezer burn. Thaw overnight in the fridge or at room temp for an hour.
- To freeze the whole loaf, wrap tightly in plastic, then foil. Label with the date; it keeps well for 2–3 months.
- After thawing, dust with powdered sugar for a fresh-baked look and a touch of sweetness.
| Storage Method | Time | Best For |
|---|---|---|
| Foil at room temp | Up to 4 days | Preserves crust and texture |
| Refrigerator (covered) | 4–5 days | Cool climates or longer hold |
| Frozen (slice or whole) | 2–3 months | Make-ahead servings and travel |
Make-ahead note: because the batter uses oil rather than butter, the crumb stays moist for days—great for prepping ahead of gatherings. And yes, you can include nutrition fields like calories and vitamin estimates in your notes, but the real vitamin here is joy when you serve it warm.
Serve, Slice, and Share This Classic Apple Cake Anytime
Slicing and sharing this loaf turns any ordinary moment into a small celebration. Let it cool fully for clean pieces, or warm a slice for that fresh-from-the-oven comfort.
For guests, arrange the pretty apple pattern on a simple platter and dust lightly with powdered sugar. Pair slices with coffee or tea for brunch, potlucks, holidays, or an easy weekday dessert.
Quick recap: use a tube pan, layer the thick batter with cinnamon‑sugar ribbons, and add a hint of orange juice and vanilla. The oil-based batter keeps the crumb moist and travel-friendly.
If you liked this cake recipe, try other cozy baking recipes for more crowd-pleasers. Bake, share a photo, and enjoy the requests that follow—you’ll be asked to make it again.