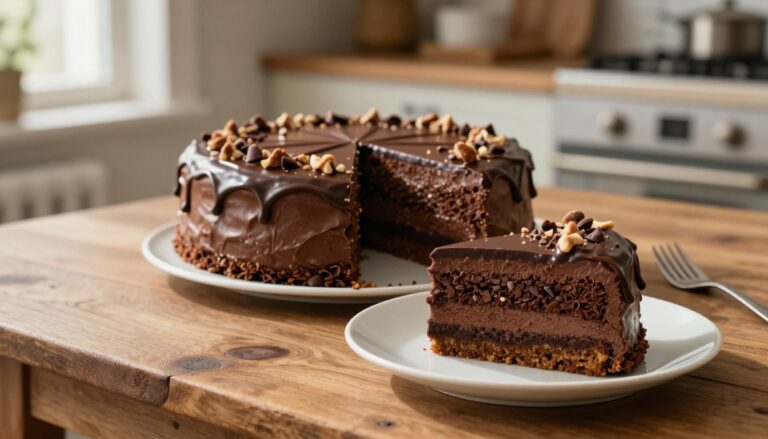
Dog Cake Recipe
I’ll open with what you came for: a truly easy dog cake recipe that smells like peanut butter and uses pup-friendly ingredients. This is a treat, not a daily meal, and I always remind you that every pet has different needs—check with your vet if you have concerns.
Pick your path: a super-simple 4-ingredient single-serve ramekin version, or a festive 6-inch party cake made with oat flour and optional carrots. Both bake at 350°F and use a toothpick or skewer to test doneness. Let the cake cool fully before frosting.
This post gives a quick roadmap so you can jump to ingredients, tools, step-by-step baking, frosting, decorating, serving size, and storage. I write for U.S. home kitchens—no fancy gear or odd ingredients—just a straightforward way to make a photo-ready treat for your furry friend.
If you want the full tested method and tips, see the linked full recipe for timing and frosting details: full dog cake recipe.
Easy Dog Birthday Cake That’s Ready Fast and Pup-Approved
Short on time but big on celebration? I’ve got a quick, tail-wagging option that still looks festive and tastes familiar to most pups.
Why this works for birthday celebrations
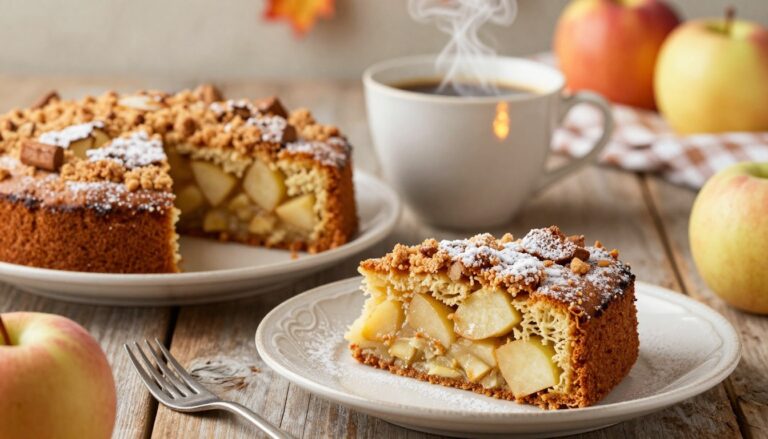
It’s joyful with almost no fuss. Familiar flavors like peanut butter and apple or pumpkin keep things safe and enticing. The texture is soft, so older or picky pets can enjoy a slice without trouble.
Timing overview for busy pet parents
The single-serve ramekin version takes about 30 minutes total: 5 minutes prep and 25–30 minutes baking. The six-inch round bakes faster (20–22 minutes) but needs extra cooling and decorating time if you want a photo-ready birthday cake.
- Preheat, mix, bake, cool, frost — plan the steps so you’re not guessing start times.
- The larger cake is great for multiple guests or saving slices for later.
- Remember to portion servings; even on a birthday, moderation matters.
In the next sections you’ll learn safety checks, ingredient swaps, frosting options, and simple decorating ideas that photograph well.
Ingredient Safety First for Dogs Eat-Friendly Baking
Safety first: a quick label check can keep a celebration cheerful instead of scary. I do this every time before I preheat the oven.
Xylitol and peanut butter checks
Xylitol is toxic and non-negotiable—scan labels every time. It may appear as birch sugar, wood sugar, xylit, or E967. If any of those words show up, walk away from that jar.
Choose natural peanut butter when possible: ideally only peanuts (and maybe salt). No sugar substitutes. Read both peanut butter and yogurt labels before using them.
Apple prep and simple dairy swaps
For apple, remove the stem and all seeds before chopping. Even small bits of seed can be risky, so I cut carefully and discard the core.
Some pups tolerate yogurt fine; others don’t. If dairy is a concern, substitute water for milk or yogurt in batter or frosting. It keeps the texture but removes the risk.
Final safety notes
Remember: we bake for safe dogs, not humans — what delights us may not be right for them. Check with your vet about allergies or diet limits before you serve.
| Ingredient | When to Use | Swap If Concerned |
|---|---|---|
| Yogurt | Use plain, label-checked | Water |
| Peanut butter | Natural, no sweeteners | Unsweetened apple sauce |
| Apple | Stem & seeds removed | Mashed banana (small amounts) |
Dog Cake Recipe Ingredients You’ll Need

Here’s a clear, no-fuss list so you can choose the tiny celebratory portion or the shareable layer. I lay out both ingredient groups and explain why each item matters, with a note on easy swaps.
Simple four-ingredient version
This small tray (or ramekin) method uses just four items and works when you want fast results.
- 1 large egg
- 3 tbsp peanut butter (natural, no xylitol)
- 1/2 apple, finely chopped (stem and seeds removed)
- 1/2 tsp baking powder
Why it’s beginner-friendly: the egg binds, the peanut adds flavor and fat, the apple gives gentle sweetness and texture, and baking powder gives a light lift.
Six-ingredient cake base for a party layer
Use this when you want a 6-inch round to slice and share. Measure cups where noted for consistent results.
- 1 cup oat flour (or blended rolled oats)
- 1/2–3/4 cup pure pumpkin puree or applesauce (not pie filling)
- 1 egg
- 2–3 tbsp melted coconut oil
- Water as needed to thin batter
- Optional: shredded carrots or 1/4 tsp turmeric
Ingredient jobs: flour provides structure, pumpkin/applesauce adds moisture, and coconut oil keeps crumbs tender. Water lets you adjust batter to the right cup-per-pan ratio.
| Version | Key Amounts | Notes / Substitutions |
|---|---|---|
| 4-ingredient | 1 egg, 3 tbsp peanut butter, 1/2 apple, 1/2 tsp baking powder | Quick, single-serve; swap water for yogurt if dairy is a concern |
| 6-ingredient | 1 cup oat flour, 1/2–3/4 cup pumpkin, 1 egg, 2–3 tbsp coconut oil | Use pure pumpkin puree (no pie filling); add carrots for moisture |
| Optional add-ins | Shredded carrots, turmeric | Carrots boost moisture and texture; turmeric adds color (optional) |
Quick substitution tip: swap equal-volume applesauce for pumpkin or a tablespoon of butter for coconut oil in a pinch. Keep spices and sweeteners out—this keeps the treat safe and consistent.
Kitchen Tools and Pan Options for Dog Cakes
Grab a spoon, a bowl, and your favorite small pan; I’ll show the rest. A tiny tool list keeps this fun and fast, whether you want a single-serve ramekin or a six-inch layer for sharing.
Ramekin single-serve method
For one portion use one bowl and one ramekin. Spray the ramekin with nonstick spray and add batter. The ramekin bakes evenly and gives a perfect portion with minimal cleanup.
Six-inch round pan setup
Line the bottom with parchment and grease the sides with coconut oil or a dog-safe spray. Aim for at least 2 inches of depth to avoid overflow when the batter rises.
- Simple path: one bowl, one spoon, one ramekin or pan.
- Depth guide: 2 inches for a 6-inch pan.
- Preheat oven to ensure steady baking and even rise.
Helpful extras for decorating
A piping bag (or a zip-top bag with a star tip) gives neat borders. A cheese grater or food processor speeds carrot prep for toppings.
| Tool | Use | Why it helps |
|---|---|---|
| Ramekin | Single-serve | Portioned, even baking |
| 6-inch pan | Shareable layer | Clean release with parchment |
| Piping bag / grater | Decorating | Smoother frosting, quick prep |
Less gear means fewer dishes and less stress. For more party-ready ideas and serving tips, check this birthday layer guide.
How to Make the Cake Batter and Bake It at 350°F
Before you mix, set the stage—preheat the oven to 350°F and prep your pan so the cake releases easily.
Pan prep and getting the oven right
Spray a ramekin with nonstick spray for single-serve. For a 6-inch layer, line the bottom with parchment and grease the sides. This avoids a sticky finish and saves stress at plating.
Mixing order for a tender batter
Whisk wet ingredients in a bowl until smooth. Gently fold in the flour to avoid overworking the mixture. If the batter is too thick, add a tablespoon of water at a time until it is thick but spreadable.
Adding carrots for extra moisture
Fold in finely shredded carrots for a moist, carrot-style birthday option. The shreds distribute moisture and keep the crumb soft without changing flavor much.
Bake minutes and doneness cues
Ramekin: bake 25–30 minutes. 6-inch pan: bake 20–22 minutes. Watch color and springiness. Insert a toothpick in the center; it comes clean when done.
Cooling so frosting behaves
Let the cake cool at least 10 minutes in the pan, then remove and cool completely before frosting. This stops frosting from melting or sliding and keeps decorations neat.
| Pan Type | Bake Minutes | Doneness Cue |
|---|---|---|
| Ramekin (single-serve) | 25–30 minutes | Toothpick comes clean; top springs back |
| 6-inch round | 20–22 minutes | Toothpick comes clean; edges pull slightly from pan |
| Carrot-add variation | Follow same minutes | Shreds add moisture; test with toothpick |
Dog-Friendly Frosting Options That Look Like the Real Thing

Let’s talk frosting that looks pro but stays pup-safe. I’ll cover two easy routes: a quick spread and a pipeable “buttercream” alternative that holds shape for photos and parties.
Peanut butter and Greek yogurt topping
Mix equal parts natural peanut butter and cup plain unsweetened Greek yogurt for a fast spread. Chill for 10–20 minutes to firm up. This combo is creamy, tangy, and fast to make.
Use a thicker ratio for piping edges and a softer mix for a smooth swoosh across the top. Portion control matters—this is a treat, not a meal.
Whipped potato “buttercream” that pipes
Whip warm mashed potato with a little yogurt or water until light and fluffy. It mimics buttercream texture and holds rosettes or borders well.
If dairy is an issue, swap water for yogurt. Work while warm for easier piping; it firms as it cools.
Getting consistency right
- Thicker for piping: less yogurt, more peanut butter or mashed potato.
- Smoother spread: add a teaspoon of water to loosen small batches.
- Chill briefly to set borders and keep decorations neat.
| Frosting Type | Best Use | Dairy Option |
|---|---|---|
| Peanut butter + Greek yogurt | Quick spread, mild piping | Use cup plain yogurt or swap water if sensitive |
| Whipped mashed potato | Piping, firm borders | Use water for dairy-free |
| Texture tips | Adjust thickness for swirls vs. borders | Chill to set |
Decorating Ideas for a Birthday Cake Your Dog Will Love
A few simple toppings make a homemade birthday cake sing in photos and at the party. I keep things bright, safe, and very easy to assemble.
Start with dog-safe toppings: shredded carrots, halved blueberries, thin banana slices, tiny strawberry pieces, and steamed green beans. Prep each in small pieces so servings stay gentle on tummies.
Easy layout ideas
- Treat border: press small dog treats or kibble around the edge for a tidy frame.
- Number shape: arrange treats into a birthday number for a fun photo prop.
- Fruit crown: make a tiny fruit ring at the center to look like a crown.
I like shredded carrots two ways: fold some into the batter for texture, then sprinkle more on top for confetti color. Use minimal fruit if your pet rarely eats produce.
| Topping | Prep | Why I Use It |
|---|---|---|
| Shredded carrots | Fine shred, folded or sprinkled | Color and crunch (low risk) |
| Blueberries | Halved for small mouths | Sweet bite, photo pop |
| Banana | Thin slices | Soft, easy to portion |
| Green beans | Steamed and cooled | Crunchy, low sugar |
| Treats / kibble | Small pieces or border | Great for photos and rewards |
Serving Size Tips for Dog Birthday Treats
When it comes to slices, size and calories matter more than the occasion. I want you to celebrate without a next-day vet visit, so a little portion planning goes a long way.
How to slice based on size and daily calories
Use your dog’s weight and activity level as the guide. For a 6-inch cake, plan small wedges for sharing.
- Large breeds: 6–8 modest slices (each a small treat alongside their normal meal).
- Medium breeds: 8–12 thinner slices or a few tablespoons per dog.
- Small breeds and puppies: 1–2 tablespoons (really — small spoons work well).
The “tablespoon test” is handy for tiny dogs. Rich ingredients like peanut butter add calories fast, so keep portions tiny and count them toward daily food allotment.
Why this shouldn’t be served in one sitting
Even natural sugars and fats can upset stomachs if eaten in large amounts. Serve slowly over a few minutes or save slices for later to avoid loose stools or discomfort.
Introduce any new ingredients gradually, especially if your pet has a sensitive gut. When in doubt, check with your veterinarian for individualized advice — a quick call can save you minutes of worry and a whole lot of stress later.
| Size | Suggested Portion | Why it helps |
|---|---|---|
| Small dogs | 1–2 tbsp | Limits fat and sugar; gentle on tummies |
| Medium dogs | 2–4 tbsp or 8–12 slices | Balancing treat with daily calories |
| Large dogs | 1 modest slice (6–8 per cake) | Enough to celebrate without overdoing it |
Storage, Make-Ahead, and Freezing for Later Treats
Make-ahead moves mean less fuss on the big day and easy treats on an ordinary day.
Store leftovers in an airtight container in the refrigerator for up to 7 days. I keep portions small so grabbing a slice is quick and tidy.
Yogurt-based frosting must stay chilled. If you frost ahead, keep the decorated cake refrigerated between servings to hold shape and freshness.
For longer storage, freeze the baked cake (unfrosted is best) for up to 1 month. I like freezing individual slices for easy, single-serve treats.
Thawing is simple: move the wrapped slice or pan to the refrigerator and leave until fully defrosted. This usually takes several hours or overnight, not minutes on the counter.
Quality tips: frost after thawing for the prettiest look, or pipe a chilled frosting that holds up. This dog cake recipe style saves you time and makes extra celebrations effortless.
| Storage Method | Duration | Best Practice |
|---|---|---|
| Refrigerator (airtight) | Up to 7 days | Keep small portions; refrigerate yogurt frosting |
| Freezer (wrapped) | Up to 1 month | Freeze unfrosted; slice before freezing for single portions |
| Thawing | Several hours to overnight | Thaw in fridge; frost after thawing for best texture |
Make It Your Own and Celebrate Your Best Friend
A few tweaks—pumpkin for moisture or extra layers for a crowd—make this an easy, personal celebration.
Customize confidently: swap applesauce and pumpkin, keep add-ins minimal, and choose a frosting that fits your pup’s tolerance. Scale the batter if you want double layers or a tiered centerpiece, but portion carefully so the party stays fun and gentle on tummies.
Do one last label check: no xylitol, and use water instead of dairy if needed. Small portions and slow servings help avoid upset bellies.
Make this a yearly tradition—same base, new decorations—and don’t forget to snap a photo before your dog dives in. Celebrate with a homemade treat and a lot of love.