Cake Donut Recipe
I’ll keep this short and useful: this is a straightforward Cake Donut Recipe for home bakers who want that bakery vibe without drama.
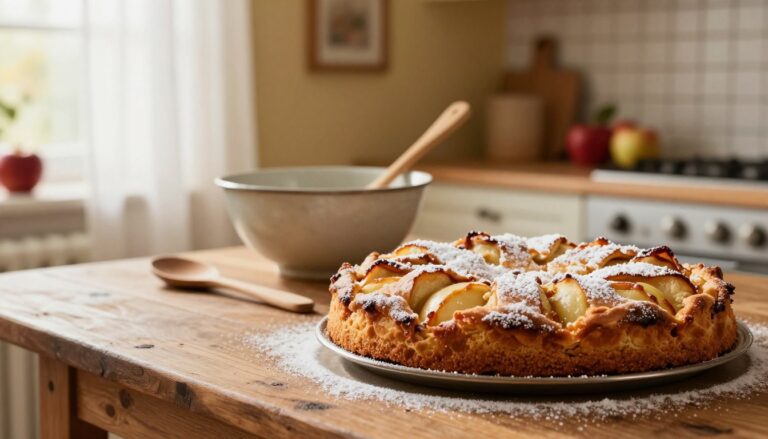
Think tender, slightly crisp edges when fried, and a soft crumb when baked. These cake donuts taste best warm and fresh—so plan to eat soon after cooking.
You can take two paths: classic frying for a true shop-style bite, or baking in a pan if you prefer no hot oil. I’ll cover ingredients, tools, step-by-step methods, and easy glazes/toppings.
Customization is the fun part—cinnamon sugar, chocolate glaze, citrus zest, sprinkles, or chopped nuts. Prep glazes before you start; timing matters and minutes fly when you make donuts.
I’ll share tested tips on batter consistency, frying temperature, and avoiding overmixing so these stay tender. Ready? Let’s get into the details and make something delicious.
What Makes Cake Donuts Different From Yeast Donuts
Not all fried rings are created equal — here’s how the cake-style version stands out.
Texture you can taste
Cake donuts have a tender, slightly dense crumb with a satisfying snap on the outside when fried. The interior is soft but firmer than yeasted versions, which feel lighter and airier.
How leavening changes the approach
These use baking powder instead of yeast, so you skip proofing and waiting. That chemical leavener gives predictable rise and a quick, reliable batch — great for beginners and busy mornings.
Fried vs. baked: what to expect
- Frying creates the classic browned shell and richer mouthfeel; control the oil temperature so donuts cook through without burning.
- Baking is cleaner and more forgiving — you’ll get a softer, more evenly tender result but less crust.
- Either way, don’t overwork the batter and watch cook times; dry donuts are a real bummer.
Want a deeper comparison? See this short take on the difference between cake and yeast doughnuts for more context.
Ingredients You’ll Need for Bakery-Quality Cake Donuts
Gathering the right pantry staples makes a big difference to the final texture and flavor. Below I break the list into dry, wet, and optional boosts so you can shop and measure like a pro.
Dry essentials
All-purpose flour works well for frying; cake flour gives a lighter crumb if you bake. Measure with the spoon-and-level method to avoid dense results.
Use baking powder for reliable lift, sugar for sweetness, and a pinch of salt to balance flavors. Add a teaspoon-level of cinnamon or nutmeg for that bakery aroma.
Wet essentials
Eggs add structure; milk keeps batter moist. Buttermilk (or a splash of lemon in milk) softens the crumb thanks to its acidity.
Melted butter brings richer flavor while oil helps retain moisture—pick based on the texture you want. Vanilla is the quiet booster that makes everything taste finished.
Optional mix-ins and measuring notes
Grated lemon zest brightens the batter. Chocolate chips or a chocolate glaze move things into full dessert mode. Nuts and extra spice are great in small amounts.
- Quick tip: spoon and level flour; use teaspoon measurements for spices.
- Buttermilk = tender crumb; melted butter = flavor; oil = moist texture.
| Ingredient | Role | Common Amount | Notes |
|---|---|---|---|
| All-purpose flour / Cake flour | Structure | 1–3 cups | Use cake flour for lighter baked results; measure carefully |
| Sugar / Salt | Sweetness / Balance | 1/2–1 cup / 1 teaspoon | Sugar level controls sweetness; salt sharpens flavors |
| Baking powder / Spices | Leavening / Aroma | 1–2 teaspoons / 1 teaspoon | Powder lifts without yeast; cinnamon or nutmeg add bakery notes |
| Egg / Milk or Buttermilk / Butter or Oil | Structure / Moisture / Fat | 1–2 eggs / 1 cup / 2–4 tablespoons | Buttermilk = tender; butter = flavor; oil = lasting moistness |
Tools and Equipment for Making Donuts at Home
You don’t need every gadget — just a few smart tools to get bakery-style results. I’ll walk you through what matters, what’s optional, and a few clever swaps so you don’t have to buy more than you’ll use.
Donut cutter alternatives
Use a 3-inch cookie cutter for the outer ring and push the end of a piping tip through the center to make the hole. It’s a simple, reusable hack that works in a pinch.
Frying setup
For frying, pick a heavy pot and pour about 2 inches of oil. Heat to 360–370°F and use a candy thermometer to hold that temperature. A slotted spoon makes flipping easy.
Drain each piece 30–60 seconds on paper towels or move them to a cooling rack so they don’t steam and go soggy.
Baking setup and filling trick
If you bake, use a donut pan or a mini donut maker. Fill wells about 2/3 full using a piping bag or a zip-top bag with the corner snipped. Let pans cool in the pan 4–5 minutes before removing.
| Tool | Purpose | DIY Swap | Quick Tip |
|---|---|---|---|
| Heavy pot | Stable heat for frying | Deep skillet | Use 2 inches of oil; monitor temperature |
| Cookie cutter + piping tip | Cut and hole punch | Two round cutters | 3-inch outer cutter for uniform size |
| Candy thermometer | Maintain oil temperature | Infrared thermometer (less ideal) | Keep oil at 360–370°F for even browning |
| Piping bag / zip-top | Cleanly fill pan wells | Spoon into wells if needed | Fill to 2/3 and bake; let rest 4–5 minutes |
Cake Donut Recipe Step-by-Step

This step-by-step walk-through takes the mystery out of turning dough in a bowl into golden rings. I’ll keep instructions simple so you can enjoy the process and get reliable results.
Mixing without overworking
In a large bowl whisk the dry mix: sugar, baking powder, spices, and salt. In a separate bowl beat the egg with milk and melted butter.
Add the wet to the dry and stir just until combined. Gradually add flour, folding gently. Stop when the dough comes together—do not overmix.
Feel the right consistency
The ideal dough is soft and slightly sticky but still workable. If it’s unmanageable, add a teaspoon of flour at a time.
Chill and why it helps
Wrap the dough and chill about 1 hour. Resting firms the dough, eases rolling, and reduces misshapen rings.
Rolling, cutting, and holes
- Lightly flour a surface and roll to about 1/2-inch thick.
- Cut rings and the centers; re-roll scraps gently (don’t overwork).
- Save the holes—they fry or bake in less time for a bonus batch.
| Stage | Quick cue | Minutes |
|---|---|---|
| Mixing in a bowl | Combine dry then wet | 5–7 |
| Chill | Wrapped, firm to touch | 60 |
| Roll & cut | 1/2-inch thickness | 10–15 |
Fried Cinnamon Sugar Cake Donuts
Hot oil and a simple sugar-cinnamon mix turn plain dough into a classic treat in minutes. I’ll walk you through oil choice, safe frying, and the quick finish that makes the coating cling.
Which oil to use and why
Pick a high smoke-point oil for cleaner flavor and safety. Canola or peanut are my go-tos; sunflower or corn oil work fine too.
Temperature and frying cues
Use about 2 inches of oil in a heavy pot and a candy thermometer. Maintain 360–370°F. If the temperature drops, the pieces soak up oil; too hot and the outside burns before the center cooks.
- Fry a couple at a time so temperature holds.
- Flip when the rings puff and edges set.
- Cook about 2–3 minutes per side until golden.
Draining, coating, and timing tips
Drain 30–60 seconds on paper towels or a cooling rack. Roll each donut while warm so the cinnamon sugar sticks; that’s the easiest way to get an even coat.
Make-ahead: dough keeps in the fridge up to two days. Bring to room temperature before frying for best results.
| Oil | Smoke Point | Best Use |
|---|---|---|
| Canola | ~400°F | Neutral flavor, steady frying |
| Peanut | ~450°F | Robust heat tolerance, slight nutty note |
| Sunflower/Corn | ~440°F / ~450°F | Good backup options for consistent frying |
Baked Cake Donuts in a Donut Pan

The oven gives you control: consistent browning and a gentler way to make rings at home. Baking in a pan is great when you want the classic shape but not the oil. These baked donuts finish clean and glaze well, so they’re perfect for a quick morning treat.
Oven temperature options and bake times for tender results
Two reliable oven choices work: a quick, hotter bake at 425°F for 7–9 minutes, or a gentler 350°F for 8–10 minutes in a donut pan or mini maker.
Either way, watch the clock—overbaking steals moisture. Buttermilk (or a splash of milk) helps keep the crumb tender. Avoid overbeating in the bowl; mix just until combined to prevent tough texture.
Filling the pan cleanly: the piping bag method
Grease the pan well so rings release easily. Use a piping bag or a zip-top with the corner snipped to fill each well about 2/3 full for even rise and neat edges.
This way you get uniform cups of batter and fewer spills. If you prefer measured control, a small cup or scoop works too.
Cooling and release: letting rings set before turning out
Let baked donuts rest in the pan for 4–5 minutes before turning out. That short time helps the structure set so the rings don’t tear.
Turn them gently onto a rack and cool slightly. They’re best served slightly warm—perfect for glazing because they’re not greasy on the surface.
| Method | Oven Temp | Bake Minutes | Key Tip |
|---|---|---|---|
| Quick bake | 425°F | 7–9 minutes | Watch closely; removes quickly to avoid dryness |
| Gentle bake | 350°F | 8–10 minutes | More forgiving for even color and tender crumb |
| Fill method | Donut pan | Fill to 2/3 | Piping bag gives clean, consistent wells |
Glazes, Toppings, and Flavor Variations
This is where simple rings become show-stoppers with a few quick glazes and smart toppings. I’ll give three easy glazes, a baked finish trick, and timing tips so toppings stick and look great.
Glossy chocolate option
For a shiny chocolate glaze: melt 1/2 cup semisweet chocolate chips with 2 tablespoons butter and 2 tablespoons corn syrup in a bowl. Stir in 1–2 teaspoons hot water to smooth and use right away.
Classic vanilla and quick cinnamon
Vanilla glaze: mix 1 cup confectioners’ sugar, 1 tablespoon milk, and 1/2 teaspoon vanilla until smooth. Adjust thickness with more sugar or milk.
Cinnamon glaze: whisk 2 cups confectioners’ sugar with 3–4 tablespoons milk and 1 teaspoon cinnamon for a warm, spiced finish.
- For baked rings: brush with melted butter, then roll in cinnamon sugar so it clings.
- Add sprinkles, chopped nuts, or coconut while the glaze is still wet so they stick.
- Set glazed items on a cooling rack over a sheet pan to catch drips and keep counters clean.
| Glaze | Key ingredients | Best way to apply |
|---|---|---|
| Chocolate glaze | Chocolate chips, butter, corn syrup | Dip or drizzle while warm |
| Vanilla | Confectioners’ sugar, milk, vanilla | Thin for drips, thick for coat |
| Cinnamon | Confectioners’ sugar, milk, cinnamon | Brush or pour for even spice |
Serving, Storing, and Making Ahead for Fresh-Tasting Donuts
Serve these warm — that brief window after cooling is when they taste their best. Let them rest until they won’t burn your mouth, then enjoy for peak texture and flavor.
If you need to make the dough ahead, wrap it tightly and refrigerate up to 48 hours. Bring the dough to room temperature before rolling so it handles easily and cooks evenly.
Unfilled rings keep in an airtight container at room temperature for 1–2 days. Filled ones should go in the fridge for a couple days; expect the texture to soften as the filling adds moisture.
Quick refresh: warm baked pieces for 10–15 minutes in a low oven to revive tenderness. Freezing usually harms texture and coatings, so make a smaller batch that you can finish in one sitting.
For more tips on timing and storage, see this take on classic cake doughnuts.