Apple Coffee Cake Recipe
I’m about to walk you through a super-moist bake with a soft vanilla center, cozy cinnamon apples, and a crunchy brown-sugar crumble that makes your kitchen smell like fall.
This is an approachable 9×13 feed-a-crowd recipe that feels bakery-level without any fancy tricks. It takes a single afternoon and yields slices that hold together for brunch, snack, or dessert.
If you like reliable results, this is for you. Expect pillowy crumb, tender fruit pockets, and a topping that crackles when you cut in. I’ll share smart substitutions and quick troubleshooting as we go, plus simple variations—nuts, a glaze, or muffin and loaf versions—so the bake stays flexible and friendly.
What Makes This Apple Coffee Cake So Moist and Tender
I love digging into the science behind a great bake. The trick here is pairing rich dairy with just enough sugar and a crunchy top so every slice is tender but not gummy.
Sour cream and whole milk for a soft, tight crumb
Sour cream gives fat and a touch of acid that keeps the crumb tight and sliceable. I use whole milk too—fat equals tenderness—so the loaf stays soft even on day two.
Brown sugar and cinnamon for cozy fall flavor
Brown sugar does double duty: it adds moisture and a caramel note without over-sweetening. A sprinkle of cinnamon warms the profile; swap apple pie spice if you like a spicier bend.
Crunchy crumble topping meets a pillowy vanilla center
The goal is contrast. A single crumble layer adds crunch against a pillowy vanilla center and juicy fruit pockets. The result: great texture and a breakfast-friendly balance that still pairs perfectly with coffee.
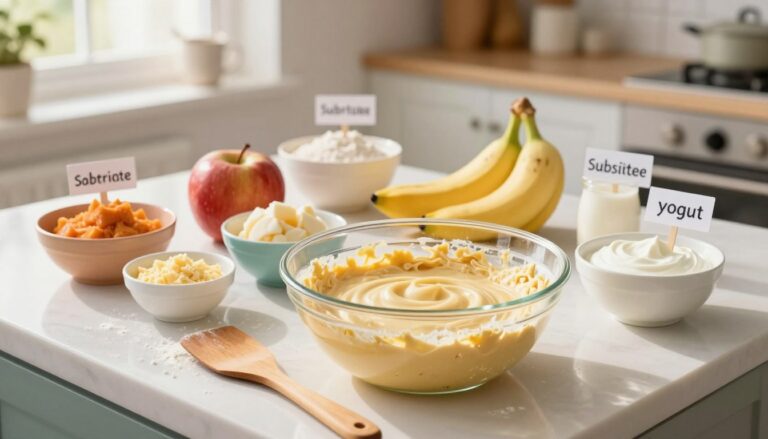
Ingredients You’ll Need (Plus Smart Substitutions)

Gathering the right ingredients is half the victory — and I’ll make that part painless. Below is a clear pantry check so you can measure and swap with confidence.
Dry items
- 2 cups all-purpose flour (spoon and level) — I call this the flour mixture for the batter.
- 2 teaspoons baking powder and ½ teaspoon kosher salt.
- 1–2 teaspoons cinnamon for warm spice.
Wet items
- 1 cup unsalted butter (softened) plus an extra 2 tablespoons for the streusel if you like extra crunch.
- 2 large eggs and 1 teaspoon vanilla extract.
- 1 cup sour cream and ½ cup whole milk (swap full-fat Greek yogurt or 2% milk if needed).
Fruit and streusel
| Variety | Flavor | Texture |
|---|---|---|
| Granny Smith | Tart | Holds shape |
| Honeycrisp | Balanced | Crisp |
| Braeburn / Fuji | Spicy-sweet / Sweet | Sturdy |
Streusel essentials: melted butter, ¾ cup brown sugar, ½ cup flour, 1 teaspoon cinnamon and a pinch of salt. It should crumble when you rub it between fingers.
Measuring note: use cups correctly and spoon-and-level your flour. That small step keeps the crumb tender instead of dense.
Equipment and Prep for Best Results
Before you touch the batter, do a quick setup: preheat, position the rack, and ready the pan. These small steps keep baking calm and cut down surprises. I promise the payoff is worth two minutes up front.
Preheat and rack position
Preheat oven to 350°F for conventional (no fan) or 325°F if you use convection. Put the rack in the middle so heat circulates evenly and the top browns at the same pace as the center.
Choosing a 9×13 pan
Metal pans heat faster and usually give a crisper edge. Ceramic or glass can take about 15 extra minutes to finish baking. Adjust time and watch for doneness a few minutes before the end.
Lining and greasing
Line the bottom with parchment and spray lightly with cooking spray. This combo makes clean slices and easy removal—no tragic first-piece crumble. If your oven runs hot and the top is darkening, tent with foil for the last few minutes.
| Pan Type | Heat Behavior | Timing Note |
|---|---|---|
| Metal | Conducts quickly; crisp edges | Standard bake time |
| Ceramic | Holds heat; slower to brown | May need ~15 extra minutes |
| Glass | Even heat but retains heat after oven off | Check a few minutes earlier, then add time if needed |
Final prep tip: do a quick mise en place. Measure dry ingredients and chop fruit before you cream butter. It keeps the cooking flow steady and your kitchen zen intact. For the full method and timing, see the full method.
Apple Coffee Cake Recipe: Step-by-Step Instructions

Start by making the crumble so you get that crackly, buttery top without it turning greasy.
Make the crumble topping (and why cooling it matters)
In one bowl, melt the butter and stir in brown sugar, flour, cinnamon, and salt until sandy. Let the mixture cool on the counter so it stays crumbly.
Quick hack: if your kitchen is warm, chill the crumble 10–15 minutes. Cold crumble holds shape and won’t melt into the batter.
Prep the apple filling with cinnamon and brown sugar
Toss diced apples with brown sugar and cinnamon in a bowl. Do this no more than ten minutes before layering.
That brief wait keeps excess liquid from pooling and turning the filling into apple soup.
Mix the cake batter
Cream butter and sugar until light. Add eggs one at a time, then vanilla.
In another bowl, whisk the flour mixture. Alternate adding dry mixture and the milk+sour cream mixture to the batter, starting and ending with flour.
Finish folding gently with a spatula so the batter stays tender, not tough.
Layering, baking, and cooling
- Spread half the batter in the pan.
- Scatter apples evenly, spoon on remaining batter, then sprinkle crumble on top.
- Bake 50–60 minutes (ceramic may need longer). Use the toothpick test—no wet batter, just a few moist crumbs.
- Let the pan rest 30–45 minutes so the center sets before slicing.
| Pan Type | Timing Note | Result |
|---|---|---|
| Metal | Standard bake time | Crisper edges |
| Ceramic | May need +10–15 minutes | Slower browning |
| Glass | Watch earlier, then add time if needed | Even heat |
Pro Tips for Bakery-Style Texture Every Time
A few smart habits in the kitchen will give you a tender, bakery-style texture every time. These moves save stress and make the slice look and taste like it belongs on a bakery shelf.
Use room-temperature ingredients to prevent overmixing
Room-temp butter, eggs, sour cream, and milk blend faster and smoother. That means you stop mixing sooner and keep the crumb light.
Quick warm-up: sit eggs in warm (not hot) water for 8–10 minutes, and set dairy on the counter for about 30 minutes before you start.
Dice evenly so the bake cooks through
Cut apples into even 1/4-inch pieces. I tested this size—it bakes through without soggy pockets or large moist holes in the crumb.
Even fruit size matters for consistent texture from corner to center. Toss diced fruit in a bowl before layering so distribution is even.
Hands off the oven for the first 30 minutes
Resist peeking. Keeping the oven door closed for the first 30 minutes helps the structure set so the middle doesn’t sink.
If the top browns too fast, tent with foil partway through baking to finish the center without burning the crumble.
| Tip | Why it helps | When to do it |
|---|---|---|
| Room-temp ingredients | Mixes quickly; less gluten development | 30 minutes before baking |
| 1/4-inch fruit dice | Even bake; no soggy pockets | Prep during mise en place |
| Oven hands-off | Prevents sinking; steady rise | First 30 minutes of baking |
Finish checklist for doneness: golden top, set center (not jiggle), and edges that pull slightly from the pan. A toothpick is fine, but these visual cues matter too.
Flavor Variations and Easy Add-Ins
One batter, endless finishes: a few smart add-ins transform the pan into a bakery-style showstopper. Below are friendly swaps and practical tips so you can remix this base for brunches, holidays, or weeknight dessert.
Nutty upgrades
Toast walnuts, pecans, or macadamia nuts for crunch. Fold them into the batter or layer with the fruit for even distribution.
Tip: toss nuts in a tablespoon of flour so they won’t sink to the bottom.
Fruit swaps
Try diced pears with a pinch of cardamom for a softer, floral profile. For a bright winter twist, add tart cranberries with ginger and nutmeg.
Dessert finishes
Serve warm with a dusting of powdered sugar, a quick spiced glaze, or a spoonful of warm caramel. A scoop of vanilla ice cream makes an instant dessert that melts into the crumble and topping.
Change the format
Make muffins or two loafs instead of a 9×13. Smaller pans bake faster—check for doneness 10–15 minutes earlier—and the same mix-ins work great.
- Treat this as a flexible base for holidays and cozy weekends.
- For full variations and a similar sour-cream twist, see this sour cream apple coffee cake.
| Add-in | How to use | Effect |
|---|---|---|
| Walnuts/Pecans/Macadamia | Toast; toss in flour; fold in | Crunch and richness |
| Pears + Cardamom | Dice like apples; layer in center | Soft, floral sweetness |
| Cranberries + Ginger/Nutmeg | Mix with sugar; scatter evenly | Tart, warming spice |
How to Serve Apple Coffee Cake for Breakfast, Brunch, or Dessert
A single pan can play three roles: an easy breakfast, a relaxed brunch centerpiece, or a cozy dessert finale. I’ll show quick pairings, when to serve warm versus room temp, and a tiny reheating trick so slices feel fresh.
Pairings that make each meal feel complete
For breakfast, keep it simple: a strong cup of coffee and a dollop of plain yogurt balance the sweet crumbs and fruit.
- Brunch: serve with whipped cream or a smear of apple butter and a pot of tea.
- Dessert: warm a slice and add salted caramel or vanilla ice cream for extra indulgence.
Best temperature and a quick warming trick
Warm slices highlight the buttery center and cozy spices. Room temperature keeps the crumble top crisp and makes clean slices.
To reheat one slice: microwave 12–15 seconds (cover with a paper towel) or warm in a 300°F oven for 6–8 minutes. Add ice cream or a spoon of cream if you want dessert vibes.
| Serving | Pairing | Why it works |
|---|---|---|
| Breakfast | Coffee + yogurt | Brightens flavor; tames sweetness |
| Brunch | Tea + whipped cream | Light and festive |
| Dessert | Vanilla ice cream/apple butter | Warm vs. cold contrast; richer top |
Storing, Freezing, and Reheating for Fresh-From-the-Oven Flavor
<!– meta: –>
A little care after baking keeps every slice tasting like it just came from the oven.
Cool the pan completely on a rack before wrapping so you don’t trap steam and soften the topping. Once cool, wrap tightly in plastic wrap or foil to protect the crumb and keep moisture in.
Keep at room temperature for 3–5 days for best texture, or refrigerate to stretch shelf life up to a week. For longer storage, pre-slice, wrap pieces individually, and freeze up to 2–3 months.
Thaw overnight in the fridge for the neatest texture, or at room temp if you need it sooner. To revive that fresh-baked warmth, reheat slices in a 350°F oven until just warmed through (a few minutes) — the apples help keep the cake moist, so it still tastes like a treat.